The first time I truly understood Chicken Korma, I wasn’t in my kitchen—I was traveling through the bustling streets of Old Delhi.
I remember the moment vividly. The air was thick with the scent of sizzling spices, and the sounds of clinking pots and sizzling oil filled the tiny alleyways. I wandered into a small, family-run eatery, where a massive pot of golden, fragrant Korma simmered away over an open flame. With one bite, I was hooked—tender chicken bathed in a creamy, spice-infused sauce that was rich, yet perfectly balanced.
That trip changed the way I looked at food. Chicken Korma wasn’t just a dish—it was a story of history, culture, and tradition all wrapped up in one bowl. So, when I came home, I had to recreate it.
At first, it felt like an impossible task. Could I really bring those deep, aromatic flavors into my own kitchen? But with the right balance of spices, a little patience, and some kitchen-tested tricks, I found the answer was yes!
Now, I want to share that experience with you.
Making Chicken Korma isn’t just about following a recipe—it’s about understanding what makes it special and learning how to bring out its authentic flavors in an easy, approachable way.
Before we start cooking, let’s take a moment to appreciate what makes Chicken Korma such a timeless, treasured dish.
Table of Contents
The Magic of Chicken Korma – History, Ingredients & Techniques
A Dish Fit for Royalty: The Origins of Chicken Korma
If you’ve ever wondered why Chicken Korma tastes so luxurious, there’s a reason for that—it was once a dish reserved for royalty. This creamy, spice-infused curry traces its roots back to the Mughal Empire in the 16th century, where it was served in lavish banquets for kings and nobles.
The word “korma” (or “qorma”) means “to braise” in Persian, which perfectly describes the cooking method—meat is first seared in ghee, then slowly simmered in a rich sauce made of yogurt, nuts, and aromatic spices. This slow-cooking technique was designed to allow flavors to meld together, creating the signature deep, layered taste of Korma.
Traditional Mughlai Korma uses ingredients like almonds, saffron, and kewra water for extra richness, but modern home versions are simpler while still delivering that same creamy, flavorful experience.
The Secret to an Authentic Chicken Korma – Ingredient Breakdown
The magic of Chicken Korma lies in its carefully balanced ingredients. Here’s what you need to know before you start cooking:
1️⃣ Choosing the Right Chicken
- Bone-in chicken thighs or drumsticks → Best for depth of flavor (traditional choice).
- Boneless chicken thighs → Great for a faster, easier version.
- Chicken breast → Can be used, but requires careful cooking to avoid drying out.
Pro Tip: Marinating the chicken in yogurt, ginger, and garlic before cooking tenderizes the meat and enhances flavor
2️⃣ The Creamy Base – Yogurt vs. Coconut Milk
- Traditional North Indian Korma: Uses plain yogurt, which adds a slight tang and rich creaminess.
- South Indian Korma Variation: Swaps yogurt for coconut milk, resulting in a slightly sweeter, tropical twist.
- Dairy-Free Alternative: If avoiding dairy, opt for cashew paste or a mix of coconut cream & ground almonds for a creamy texture.
To prevent the yogurt from curdling, whisk it well and add it slowly over low heat, stirring constantly
3️⃣ Essential Spices – The Heart of Korma
Unlike some curries that rely heavily on chili heat, Chicken Korma is mild yet aromatic, thanks to its carefully selected whole and ground spices:
✔ Whole Spices (Tempered in Oil/Ghee): Bay leaves, green cardamom, cloves, cinnamon, black peppercorns.
✔ Ground Spices (For Depth of Flavor): Coriander, cumin, garam masala, turmeric, and a touch of nutmeg.
🔹 Pro Tip: Toasting whole spices in ghee or oil before adding other ingredients unlocks deeper flavors in your Korma.
4️⃣ Nuts & Flavor Enhancers – The Final Touch
- Ground almonds or cashews → Adds the signature creamy richness.
- Kewra or rose water → Provides a subtle floral aroma, elevating the dish.
- Fried onions (birista) → Blended into the sauce for authentic Mughlai depth.
The Science of Slow Cooking: Why Technique Matters
Chicken Korma isn’t a dish you rush—it’s meant to be slow-cooked and layered with flavor. Here’s why technique makes all the difference:
✅ Braising the Chicken: Searing locks in moisture and creates a flavorful base.
✅ Slow Simmering: Allows the sauce to thicken naturally and the spices to develop fully.
✅ Fat Separation Indicator: The dish is done when you see oil/ghee rising to the top, a sign that the flavors have melded perfectly.
Now that you understand what makes Chicken Korma special—its rich history, carefully selected ingredients, and slow-cooking techniques—you’re ready to start preparing it!
Before we jump into the step-by-step recipe, let’s go over some pre-cooking essentials, including what you need to have ready before turning on the stove.
Pre-Cooking Guide – Essential Prep Steps for the Perfect Chicken Korma
Setting Yourself Up for Success
Before you turn on the stove and dive into cooking, let’s talk about one of the biggest secrets to making the perfect Chicken Korma—preparation. If you’ve ever ended up with curdled sauce, unblended spices, or dry chicken, the issue probably started before you even turned on the stove.
A little preparation goes a long way in getting restaurant-quality results. Let’s cover the essential tools, techniques, and common mistakes to ensure your Korma turns out creamy and flavorful.
Essential Kitchen Tools for Cooking Chicken Korma
While you don’t need a fancy setup, having the right tools makes a noticeable difference. Here’s what you’ll want to have ready:
✔ Heavy-Bottomed Pan or Dutch Oven – Helps evenly distribute heat, preventing the yogurt-based sauce from scorching.
✔ Mortar & Pestle or Spice Grinder – Freshly ground spices add a deeper, more aromatic flavor compared to pre-ground versions.
✔ Sharp Chef’s Knife – Makes prepping chicken and onions easier and faster.
✔ Blender or Food Processor – Essential for blending fried onions and nuts into a smooth, creamy base.
✔ Whisk – Helps incorporate yogurt into the curry without curdling.
🔹 Alternative Option: No spice grinder? Use pre-ground spices, but toast them lightly in an dry pan before adding to enhance their fragrance.
Prepping Ingredients Like a Pro
Getting your ingredients prepped and ready before cooking ensures smooth execution.
1️⃣ Marinating the Chicken for Maximum Flavor
A great Chicken Korma starts with well-marinated meat. Don’t skip this step!
✔ Time: Marinate for at least 30 minutes (ideally overnight for best results).
✔ Why It Matters: The yogurt, ginger, and garlic work together to tenderize the chicken and infuse it with flavor.
✔ Shortcut: If short on time, a 15-minute quick marinade at room temperature can still make a difference.
🔹 Common Mistake: Adding salt too early in the marinade can draw out moisture from the chicken. Add it just before cooking for the juiciest results.
2️⃣ The Secret to Perfectly Fried Onions (Birista)
Authentic Chicken Korma gets its signature depth of flavor from golden-fried onions, blended into the sauce.
✔ How to Do It Right:
- Slice onions thinly and evenly for uniform cooking.
- Fry in ghee or neutral oil until golden brown and crispy.
- Drain excess oil and let cool before blending into a paste.
🔹 Pro Tip: Want to save time? Store-bought fried onions work in a pinch—just be sure to blend them with a little warm water to soften.
3️⃣ Prepping the Spice Blend for a Well-Rounded Flavor
Instead of dumping spices into the pan all at once, layering them correctly builds a richer, more complex taste.
✔ Whole Spices (Tempered in Oil First): Bay leaves, cloves, cinnamon, cardamom, black peppercorns.
✔ Ground Spices (Added Later): Coriander, cumin, garam masala, turmeric, nutmeg.
🔹 Pro Tip: If using pre-ground spices, bloom them in ghee for 30 seconds before adding liquid to release their full aroma.
Common Mistakes to Avoid Before Cooking
Let’s make sure you don’t accidentally sabotage your Chicken Korma before it even hits the pan!
❌ Skipping the Marination Step – Leads to bland, dry chicken. Always marinate!
❌ Not Controlling Heat When Adding Yogurt – High heat causes it to curdle. Always lower the heat and whisk continuously.
❌ Rushing the Onion Frying Step – Under-fried onions = lack of depth in flavor.
❌ Adding Too Much Liquid Too Soon – Start with less; you can always adjust later.
Final Prep Checklist Before Cooking
✅ Chicken is marinated and ready.
✅ Onions are fried and blended.
✅ Spices are measured and prepped.
✅ Tools are set up for smooth cooking.
Now that everything is in place, let’s move on to the fun part—cooking the Chicken Korma!
Step-by-Step Guide – Cooking the Perfect Chicken Korma
Bringing It All Together – Let’s Cook!
Now that everything is prepped and ready, it’s time to bring your Chicken Korma to life! This step-by-step guide will help you create a rich, creamy, and flavorful dish that tastes like it came straight from a traditional Mughlai kitchen. Follow along carefully, and in about 45 minutes, you’ll have a delicious, aromatic curry that your family will love.
Step 1: Sauté the Whole Spices for Maximum Flavor
📌 Why this step matters: Cooking whole spices in hot oil releases their essential oils, which enhances the depth of flavor in your Korma.
1️⃣ Heat 2 tablespoons of ghee or oil in a heavy-bottomed pan or Dutch oven over medium heat.
2️⃣ Add 2 bay leaves, 3 green cardamom pods, 4 cloves, and a small cinnamon stick.
3️⃣ Stir them around for 30-40 seconds until fragrant. The kitchen should start smelling warm and aromatic!
Step 2: Caramelize the Onions – The Secret to a Deep, Rich Base
📌 Why this step matters: Properly browned onions give Chicken Korma its signature depth and slightly sweet undertone.
1️⃣ Add 2 cups of thinly sliced onions to the pan. Stir well to coat them in the oil.
2️⃣ Cook on medium-low heat, stirring occasionally, until the onions turn golden brown and slightly crispy. This takes about 12-15 minutes—don’t rush it!
3️⃣ Remove half of the fried onions and set them aside for garnish.
🔹 Pro Tip: If onions start sticking, add a splash of water to deglaze the pan and keep cooking.
Step 3: Cook the Chicken & Layer the Spices
📌 Why this step matters: Cooking the chicken with spices at this stage ensures it absorbs all the flavors before adding liquid.
1️⃣ Add 1 tablespoon of ginger-garlic paste to the pan and sauté for 30 seconds until fragrant.
2️⃣ Add the marinated chicken (bone-in or boneless) and stir well, coating it in the onion mixture.
3️⃣ Cook for 5-7 minutes, stirring occasionally, until the chicken turns white and starts to lightly brown.
4️⃣ Sprinkle in 1 teaspoon coriander powder, ½ teaspoon cumin powder, and ½ teaspoon Kashmiri chili powder (optional for color). Stir well.
🔹 Pro Tip: Don’t rush this step! Let the chicken cook in its own juices for a few minutes before adding liquid.
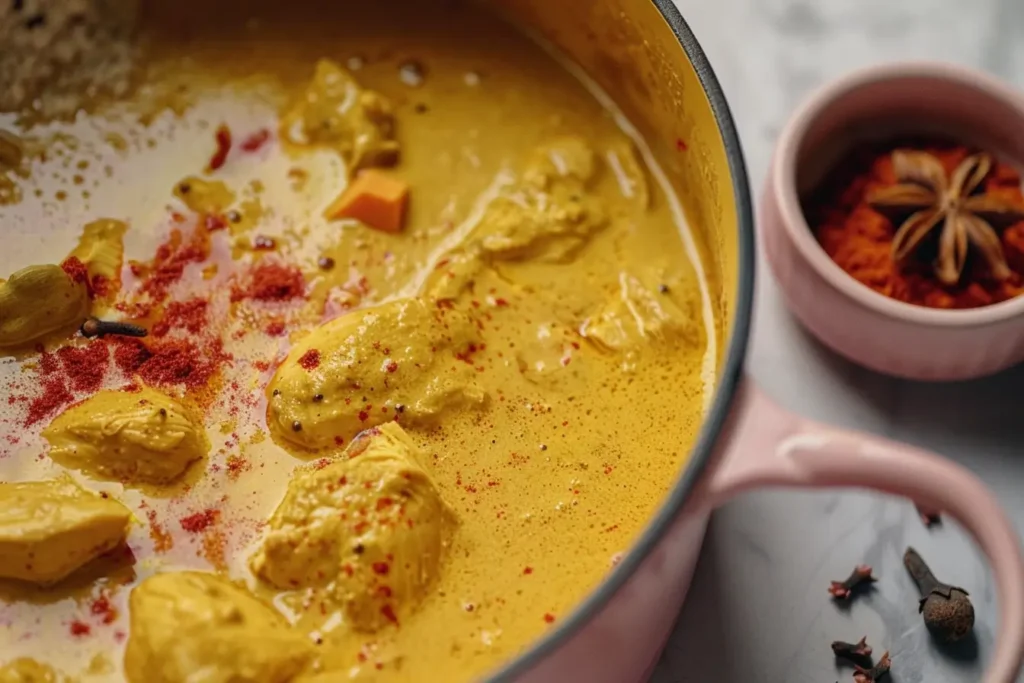
Step 4: Create the Creamy Korma Sauce
📌 Why this step matters: Blending nuts and yogurt into a smooth paste gives Korma its signature creamy texture.
1️⃣ In a blender or food processor, combine:
✔ The reserved fried onions
✔ 10 cashew nuts or almonds (pre-soaked for 10 minutes)
✔ ½ cup plain yogurt (room temperature)
2️⃣ Blend into a smooth paste. If it’s too thick, add a tablespoon of water.
3️⃣ Lower the heat and slowly stir in the paste to the pan, mixing continuously to prevent curdling.
🔹 Pro Tip: Whisk the yogurt before adding it to avoid curdling. Keep the heat low!
Step 5: Simmer and Let the Flavors Develop
📌 Why this step matters: Slow cooking helps the chicken become tender while allowing the sauce to thicken naturally.
1️⃣ Add ½ cup warm water and ½ teaspoon salt to the pan. Stir well.
2️⃣ Cover and let the curry simmer on low heat for 15-20 minutes, stirring occasionally.
3️⃣ Once the oil starts separating from the sauce, you know it’s ready!
4️⃣ Taste and adjust salt, spice, or thickness as needed.
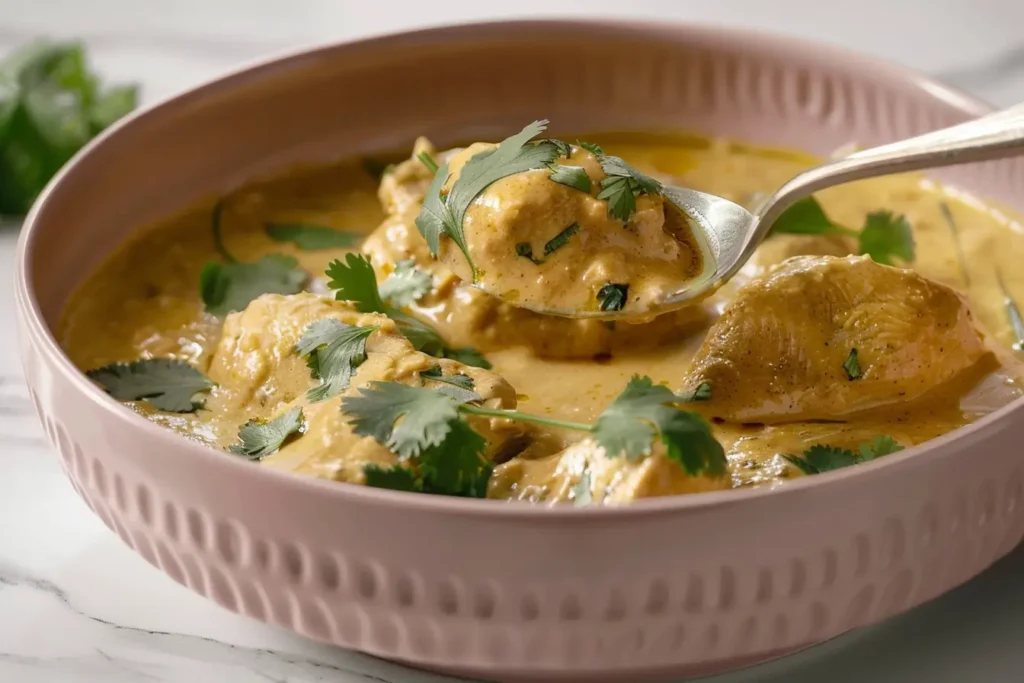
Step 6: Final Touches & Garnishing
📌 Why this step matters: These finishing touches take the dish from good to amazing!
1️⃣ Stir in ½ teaspoon garam masala and a pinch of nutmeg for warmth.
2️⃣ Add 1 teaspoon kewra water or rose water (optional but highly recommended for an authentic touch).
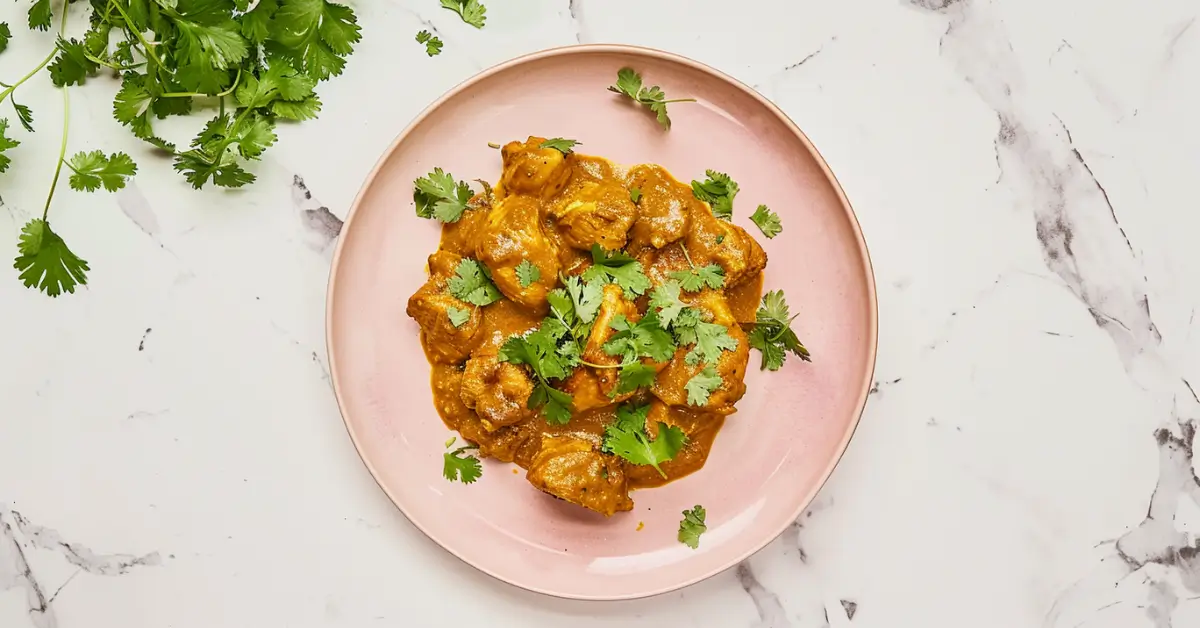
3️⃣ Garnish with chopped cilantro and the reserved fried onions.
🔹 Pro Tip: Let the Korma sit for 5 minutes before serving—it allows the flavors to meld beautifully.
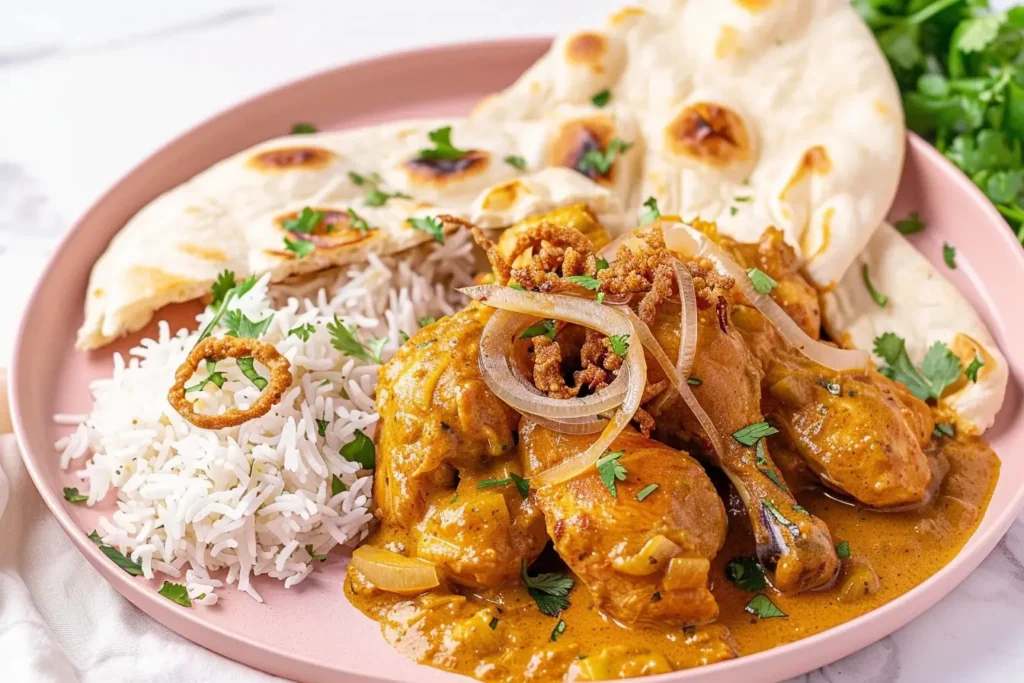
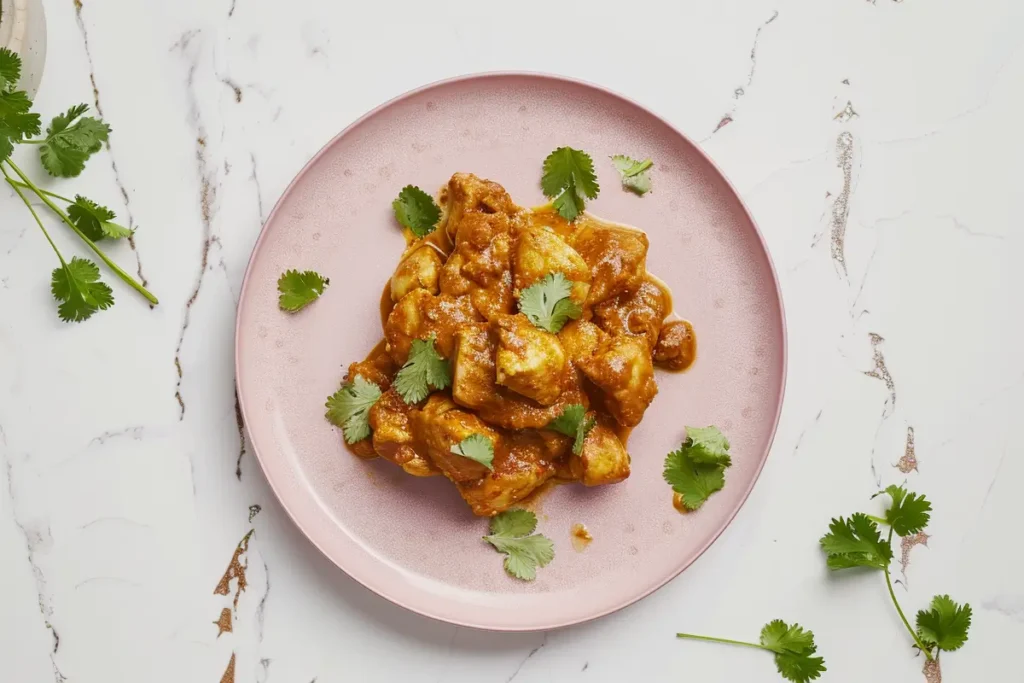
Step 7: Serve & Enjoy!
📌 Best pairings:
✔ Naan or roti – Perfect for scooping up the rich, creamy sauce.
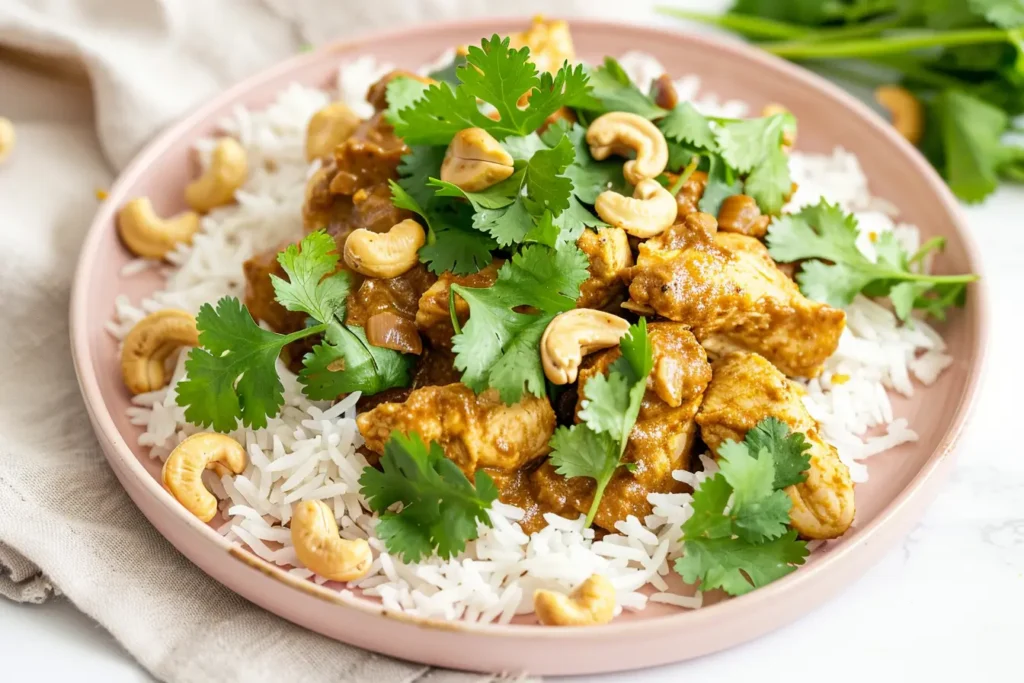
✔ Basmati rice or jeera rice – Absorbs the flavors beautifully.
✔ Side options: Raita, pickles, or a simple cucumber salad for balance.
✨ Now, take that first bite—creamy, aromatic, and deeply flavorful. This is Chicken Korma at its best!
Additional Tips, Serving Ideas, and Storage Guide
How to Elevate Your Chicken Korma Experience
Now that you’ve masterd the art of making Chicken Korma, let’s take it a step further. Whether you want to enhance flavors, store leftovers properly, or find the perfect pairings, these tips will help you make the most out of your dish.
Best Side Dishes & Perfect Pairings
📌 Chicken Korma is a rich, creamy dish—pairing it with the right sides can balance flavors and enhance your dining experience.
✔ Classic Pairings:
- Basmati Rice: The fluffy, fragrant grains absorb the Korma sauce beautifully. Try jeera rice for an extra layer of flavor.
- Naan or Paratha: Soft, buttery Indian bread is perfect for scooping up every last bit of sauce.
- Cucumber Raita: A cooling yogurt-based side dish that complements the spice and richness of Korma.
✔ Healthier Alternatives:
- Quinoa or Brown Rice: A nutritious substitute that pairs well with the creamy texture.
- Whole Wheat Roti: Lighter than naan but just as satisfying.
- Grilled Vegetables: Roasted bell peppers, zucchini, or eggplant add a delicious contrast.
🔹 Pro Tip: For a restaurant-style experience, garnish your Chicken Korma with a drizzle of saffron-infused milk and a sprinkle of chopped almonds or cashews before serving.
How to Store & Reheat Chicken Korma
📌 If you have leftovers, storing them correctly ensures that your Chicken Korma remains just as delicious the next day!
Refrigeration (Best for 3 Days)
✔ Let the Korma cool completely before transferring it to a airtight container.
✔ Store in the coldest part of the fridge (not the door).
✔ Best consumed within 48-72 hours for peak freshness.
Freezing (Best for Up to 3 Months)
✔ For long-term storage, freeze Chicken Korma in portion-sized airtight containers or freezer bags.
✔ Label with the date so you remember when to use it.
✔ Thaw in the refrigerator overnight before reheating.
Reheating (Without Losing Creaminess!)
✔ Stovetop (Best Method): Heat on low-medium heat, adding a splash of water or milk to revive the creamy texture.
✔ Microwave: Use a low-power setting, cover with a lid, and stir halfway to ensure even heating.
✔ Avoid high heat! It can cause the yogurt-based sauce to separate.
🔹 Pro Tip: If the sauce thickens too much after refrigeration, add a little warm water or cream while reheating to restore the perfect consistency.
Creative Ways to Use Leftover Chicken Korma
📌 Turn your leftovers into a new, exciting meal!
✔ Chicken Korma Wraps: Stuff warm naan or tortilla wraps with shredded Chicken Korma, lettuce, and yogurt sauce.
✔ Korma-Stuffed Bell Peppers: Fill halved bell peppers with leftover Korma and bake until tender.
✔ Korma Pulao: Mix leftover Korma with cooked rice, a splash of broth, and extra spices for a quick-flavored rice dish.
🔹 Pro Tip: Leftovers taste even better the next day as the flavors continue to develop—just be sure to store them properly!
📌 Explore more delicious Indian-inspired dishes:
✔ Looking for another comforting meal? Try this Chicken and Shrimp Recipe, which pairs beautifully with basmati rice!
✔ For a perfect side dish, check out this Chicken and Dressing Recipe that complements creamy curries.
✔ For an alternative preparation, visit AllRecipes’ Chicken Korma to see another take on this classic dish.
Final Thoughts – Enjoying Every Bite!
Making Chicken Korma at home isn’t just about following a recipe—it’s about creating a dish that’s rich in history, flavor, and tradition. With the right techniques, thoughtful pairings, and smart storage tips, you can enjoy this beloved dish anytime.
FAQ Section & Recipe Schema for Chicken Korma
Q1: What makes Chicken Korma different from other curries?
Chicken Korma is a mild, creamy curry that’s made with a base of yogurt, nuts, and aromatic spices. Unlike other curries, it doesn’t rely heavily on heat but instead on complex spices and rich, slow-cooked flavors. It’s often served with naan or rice to soak up the luxurious sauce.
Q2: Can I make Chicken Korma ahead of time?
Yes! Chicken Korma actually tastes better the next day as the flavors continue to meld. You can prepare the dish up to the point where it’s ready to simmer, let it cool, and store it in the fridge for up to 3 days. Reheat gently to maintain its creamy texture.
Q3: Is Chicken Korma spicy?
Traditionally, Chicken Korma is not spicy. Instead, it’s aromatic with mild heat. If you prefer more spice, feel free to add a pinch of cayenne pepper or extra chili powder to suit your taste.
Q4: Can I make Chicken Korma without nuts?
Yes, you can. If you or your guests are allergic to nuts, simply skip the cashews or almonds. You can substitute with a little coconut milk for creaminess or blend in sunflower seeds as an alternative.
Q5: What are some variations of Chicken Korma?
There are several regional variations of Korma! For a vegetarian option, replace the chicken with paneer or mixed vegetables. You can also try adding coconut milk for a sweeter, tropical twist or use chicken breast for a leaner version.
Q6: Can I freeze Chicken Korma?
Yes! Chicken Korma freezes well. Store it in airtight containers or freezer bags for up to 3 months. Let it cool completely before freezing. When ready to eat, thaw it overnight in the fridge and reheat on low heat to keep the sauce creamy.
Looking for more delicious recipes? If you love hearty meals, check out our Main Dishes collection—perfect for family dinners or special occasions. Or, if you’re craving something sweet, browse our Snacks, Desserts & Bites section for tasty treats. There’s always something new and exciting to cook!
Print
Chicken Korma Recipe
- Total Time: 1 hour
- Yield: 4 servings 1x
Description
A rich and creamy Chicken Korma made with aromatic spices, yogurt, and nuts for a luxurious, flavorful meal.
Ingredients
- 1 lb bone-in chicken thighs, skin removed
- 1 large onion, thinly sliced
- 3 cloves garlic, minced
- 1 tablespoon ginger-garlic paste
- 2 tablespoons ghee or oil
- 2 bay leaves
- 3 green cardamom pods
- 4 cloves
- 1 small cinnamon stick
- 1 teaspoon coriander powder
- 1 teaspoon cumin powder
- 1 teaspoon Kashmiri chili powder (optional for color)
- 1/2 cup cashew nuts (soaked for 10 minutes)
- 1/2 cup plain yogurt, whisked
- 1/2 teaspoon garam masala
- 1/2 teaspoon nutmeg
- 1 teaspoon kewra water or rose water (optional)
- 1/2 cup warm water
- Salt to taste
Instructions
- Heat ghee in a heavy-bottomed pan. Add bay leaves, cardamom, cloves, and cinnamon stick. Sauté for 30-40 seconds.
- Add sliced onions and cook until golden brown and crispy, about 15 minutes. Reserve half for garnish.
- Add ginger-garlic paste and marinated chicken. Cook for 7-10 minutes, stirring occasionally.
- Add ground spices and sauté for 2 minutes until fragrant.
- Blend cashews, fried onions, and yogurt into a smooth paste and add it to the pan. Stir to combine.
- Add warm water and salt. Let simmer for 20 minutes until chicken is tender and the sauce thickens.
- Stir in garam masala, nutmeg, and kewra water. Garnish with cilantro and fried onions.
Notes
For a spicier version, add chili powder or chopped green chilies to the cooking process.
- Prep Time: 20 minutes
- Cook Time: 40 minutes
- Cuisine: Indian
Nutrition
- Serving Size: 1 serving (~1 cup)
- Calories: ~400 kcal
- Sugar: ~6g
- Fat: ~20g
- Carbohydrates: ~30g
- Fiber: ~5g
- Protein: ~28g
- Cholesterol: ~80mg