If you had told me a few years ago that I’d be making restaurant-quality salmon sashimi in my own kitchen, I would’ve laughed. Raw fish? At home? No way. But one night, after an intense sushi craving and zero motivation to leave the house, I decided to give it a shot. I found a reputable seafood market, got my hands on some sashimi-grade salmon, and nervously sharpened my knife.
The first few slices? A disaster. Uneven, awkward, some too thick, some barely there. But then, something clicked. I slowed down, adjusted my angle, and with one clean stroke—there it was. A perfectly smooth slice of salmon, glistening like the ones I’d seen at my favorite sushi spot. And when I dipped it in soy sauce with a touch of wasabi? Pure heaven.
Since that night, salmon sashimi has become my go-to dish when I want something fresh, satisfying, and ridiculously easy to prepare. No complicated cooking techniques, no long ingredient lists—just high-quality salmon, a sharp knife, and a few simple garnishes to bring out its natural flavors.
And here’s the best part: you don’t need to be a professional chef to do this. Once you know a few key tips—like how to choose the right salmon and the best way to slice it—you’ll be making your own sushi-bar-worthy sashimi in no time.
But before we dive into the step-by-step process, let’s talk about what makes salmon sashimi so special—and why choosing the right fish is the most important part of this dish.
Table of Contents
What Makes Salmon Sashimi So Special?

You might think any kind of salmon will work for sashimi, but trust me—choosing the right one makes all the difference. The quality of your fish is the single most important factor in making perfect sashimi. But what exactly makes salmon “sashimi-grade,” and how do you know you’re getting the best? Let’s break it down.
What Is Sashimi-Grade Salmon? (And Why It Matters)
Not all salmon is safe to eat raw. In fact, most supermarket salmon isn’t sashimi-grade because it hasn’t been properly handled to ensure safety. Here’s what makes sashimi-grade salmon different:
✔ Flash-Frozen for Safety – To kill any potential parasites, sashimi-grade salmon is frozen at -31°F (-35°C) or lower before being sold. This process ensures the fish is safe to eat raw.
✔ Handled with Extreme Care – From the moment it’s caught, sashimi-grade salmon is kept at the right temperatures to preserve freshness and texture.
✔ Premium Quality Cuts – Sashimi-grade salmon comes from the freshest part of the fish, often free from bruises or discoloration.
📌 Pro Tip: Never buy regular grocery store salmon and eat it raw—it’s not processed with sashimi safety standards in mind. Instead, look for sushi-grade or sashimi-grade labeling at a trusted seafood market.
How to Choose the Best Salmon for Sashimi
When selecting salmon for sashimi, keep these three key factors in mind:
1. Appearance & Texture
✔ Look for vibrant orange or deep red flesh with clear marbling (fat streaks).
✔ The flesh should be firm and spring back when pressed—avoid anything soft or mushy.
2. Smell & Freshness
✔ Fresh salmon shouldn’t smell “fishy”—it should have a clean, ocean-like scent.
✔ If it has a strong or sour smell, it’s not fresh enough for sashimi.
3. Where You Buy It Matters
✔ Purchase from Japanese markets, specialty seafood shops, or trusted online sources that guarantee sashimi-grade quality.
✔ If in doubt, ask the seller if it’s safe to eat raw—they should be able to provide proper handling details.
📌 Pro Tip: If you can’t find fresh sashimi-grade salmon, frozen options from reputable brands are a great alternative! Just make sure to thaw it properly in the fridge overnight before slicing.
The Health Benefits of Salmon Sashimi
Beyond its incredible taste and delicate texture, salmon sashimi is a nutritional powerhouse. Here’s why:
✔ Packed with Omega-3s – These healthy fats support heart health, brain function, and glowing skin.
✔ High in Protein, Low in Calories – Each serving delivers lean protein to keep you full and satisfied.
✔ Loaded with Vitamins & Minerals – Rich in B vitamins, selenium, and antioxidants, salmon sashimi is great for overall wellness.
📌 Healthier Eating Tip: Pair your salmon sashimi with fresh greens, pickled ginger, and a light ponzu sauce for a well-rounded, low-calorie yet satisfying meal.
Bringing It All Together
Now that you know how to choose the best salmon and why it matters, you’re ready for the next step—preparing everything you need to make flawless salmon sashimi at home.
In the next section, we’ll cover the essential tools, cutting techniques, and the best way to slice salmon like a pro. Let’s get started!
Prepping Like a Pro – Everything You Need Before Making Salmon Sashimi
Before we dive into slicing and plating, let’s talk about something that can make or break your homemade salmon sashimi—the right prep work. Getting everything set up before you start ensures clean cuts, fresh flavors, and a restaurant-quality presentation.
Many people think they can just grab a knife, cut some salmon, and call it sashimi. But prepping your tools and ingredients correctly makes a huge difference. So before we move on to the recipe steps, let’s go over a few key things to get ready.
Essential Tools & Equipment
Making perfect salmon sashimi doesn’t require fancy equipment, but having the right tools can elevate your technique and presentation. Here’s what you’ll need:
✔ A Sharp Knife (Preferably a Sashimi Knife or Chef’s Knife) – A dull knife will tear the delicate salmon instead of giving you those clean, smooth slices. If you don’t have a sashimi knife, a well-sharpened chef’s knife will work.
✔ Cutting Board (Wood or Plastic) – Avoid glass or stone cutting boards, which can dull your knife. A large wooden or plastic board is best for clean slicing.
✔ Tweezers or Fish Bone Pliers – Essential for removing any tiny bones that might still be in the salmon fillet.
✔ Paper Towels – Helps pat the salmon dry before slicing, which improves texture and prevents the knife from slipping.
✔ A Clean, Dry Plate – For arranging your sashimi slices as you go.
📌 Pro Tip: If your knife isn’t slicing smoothly, run it along a sharpening stone or honing rod before you start. A sharp blade will make cutting sashimi effortless!
Prepping Your Salmon: How to Get It Just Right
1. Start with Sashimi-Grade Salmon
We covered this in Part 2, but it’s worth repeating—ONLY use sashimi-grade salmon from a trusted source. If you’re unsure, ask your fishmonger if it’s safe for raw consumption.
2. Chill the Salmon Before Slicing
Cold salmon is easier to slice cleanly and evenly. Here’s how to prep it:
✔ Keep the salmon in the fridge until you’re ready to cut.
✔ For extra precision, place it in the freezer for 15 minutes before slicing. This firms up the flesh, making it easier to handle.
3. Remove Any Pin Bones
✔ Run your fingers along the salmon fillet. If you feel any tiny bones, use tweezers or fish bone pliers to gently pull them out.
✔ This step is crucial—biting into a sashimi piece with a hidden bone is not fun!
4. Pat the Salmon Dry
✔ Use a paper towel to gently blot any excess moisture. This ensures a smooth texture and a better knife grip.
📌 Pro Tip: Avoid washing raw salmon with water—it can spread bacteria and alter the texture. Drying it with paper towels is all you need!
Common Mistakes to Avoid Before Cutting
Even with the best salmon, a few simple mistakes can ruin your sashimi experience. Here’s what NOT to do:
❌ Slicing Warm Salmon – This leads to messy, uneven cuts and can make the fish fall apart. Always chill before slicing.
❌ Using a Dull Knife – A dull blade will crush the salmon instead of slicing it cleanly. Sharpen your knife before starting!
❌ Cutting Too Thin or Too Thick – Traditional sashimi slices are about ¼ inch thick—thin enough to be delicate, but thick enough to enjoy the texture.
❌ Skipping the Bone Check – Even if your fillet looks boneless, always double-check for hidden pin bones.
📌 Pro Tip: Want picture-perfect sashimi slices? Use one long, smooth stroke with your knife—no sawing motions!
Planning Your Timing: How Long Does Everything Take?
Wondering how much time to set aside for making sashimi? Here’s a realistic breakdown:
🕒 5 minutes – Gathering your tools & ingredients
🕒 10 minutes – Checking for bones, drying the salmon, and chilling it before slicing
🕒 5-7 minutes – Cutting and arranging the sashimi
Total prep time: 20-25 minutes (but every second is worth it for perfect sashimi!)
Final Prep Step Before We Slice!
Now that everything is ready—salmon chilled, knife sharpened, tools set up—it’s time for the fun part: slicing like a pro. In the next section, we’ll go step by step through the best techniques for cutting sashimi just like they do in Japanese restaurants.
📌 Let’s get slicing!
Step-by-Step Guide to Making Salmon Sashimi Like a Pro
Now that everything is prepped and ready, it’s time for the most exciting part—slicing and plating your salmon sashimi like a sushi chef! Don’t worry if you’ve never done this before. With the right technique and a little patience, you’ll have beautifully cut salmon sashimi ready to serve in no time.
Let’s get started!
Step 1: Preparing Your Workstation
Before slicing, make sure you have everything in place:
✔ Your sharpest knife (a sashimi knife or a well-sharpened chef’s knife)
✔ A sturdy cutting board (wood or plastic—avoid glass)
✔ A damp paper towel (to wipe the knife between slices for cleaner cuts)
✔ Your chilled, sashimi-grade salmon fillet
📌 Pro Tip: Lightly wet your knife blade before slicing to help it glide through the salmon effortlessly.
Step 2: Trimming & Cleaning the Salmon
✔ Place the salmon fillet on your cutting board, skin-side down if it still has the skin.
✔ If the skin is attached, carefully remove it by sliding your knife underneath at a slight angle. Hold one end of the skin and gently pull as you slice along the fish.
✔ Check for any pin bones by running your fingers over the fillet. If you feel any, use fish tweezers to remove them.
📌 Pro Tip: Removing the skin ensures a smooth slicing experience and makes the presentation cleaner.
Step 3: Choosing Your Slicing Method
There are two traditional ways to cut sashimi, depending on how you want to serve it:
🔹 Hira-Zukuri (Rectangular Slices) – The most common cut, ideal for thicker, meaty slices of salmon sashimi. Perfect for dipping in soy sauce and enjoying the full texture of the fish.
🔹 Sogigiri (Angled Slices) – A delicate slicing technique where the knife is held at a 45-degree angle, creating thinner, more elegant pieces. Great for pairing with garnishes like ponzu sauce and jalapeño.
📌 Which one should you choose? If it’s your first time, start with Hira-Zukuri—it’s the easiest to master!
Step 4: Slicing the Salmon Like a Pro
✔ Angle your knife at 20–30 degrees and slice across the grain in one smooth motion—no sawing.
✔ Aim for ¼-inch thick slices (about pencil width).
✔ Wipe the knife blade clean after each cut for precision.
✔ Repeat until your salmon is perfectly sliced.
📌 Pro Tip: A sharp knife and confident stroke = clean, professional cuts.
Step 5: Arranging & Plating Your Sashimi
Now that your sashimi is beautifully sliced, it’s time to plate it like a sushi chef.
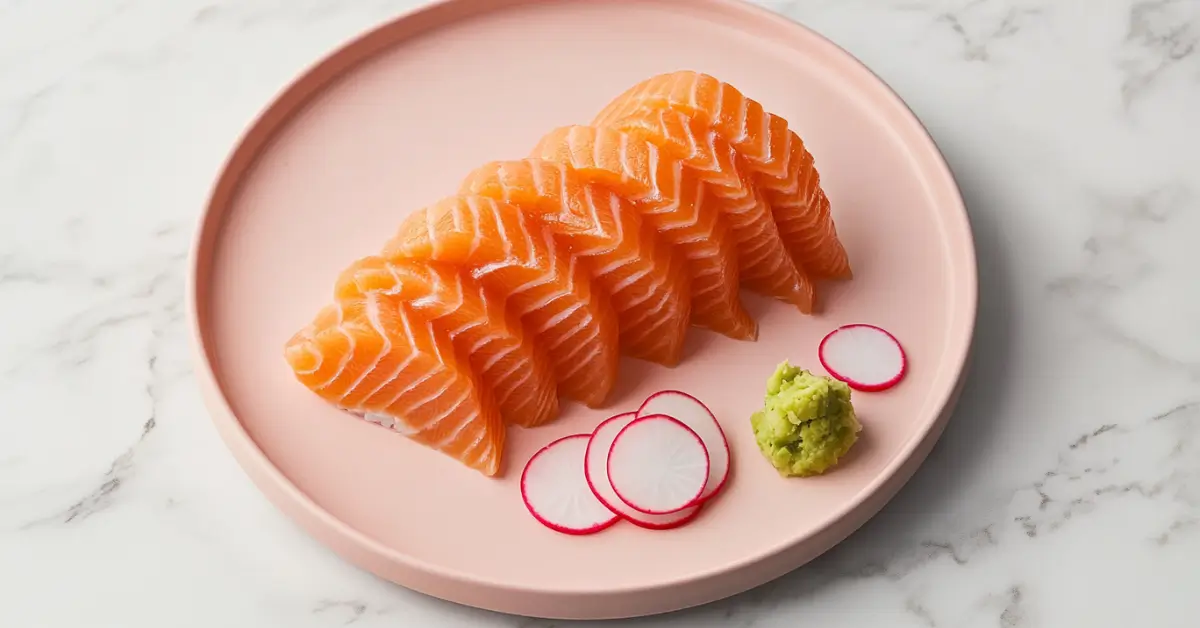
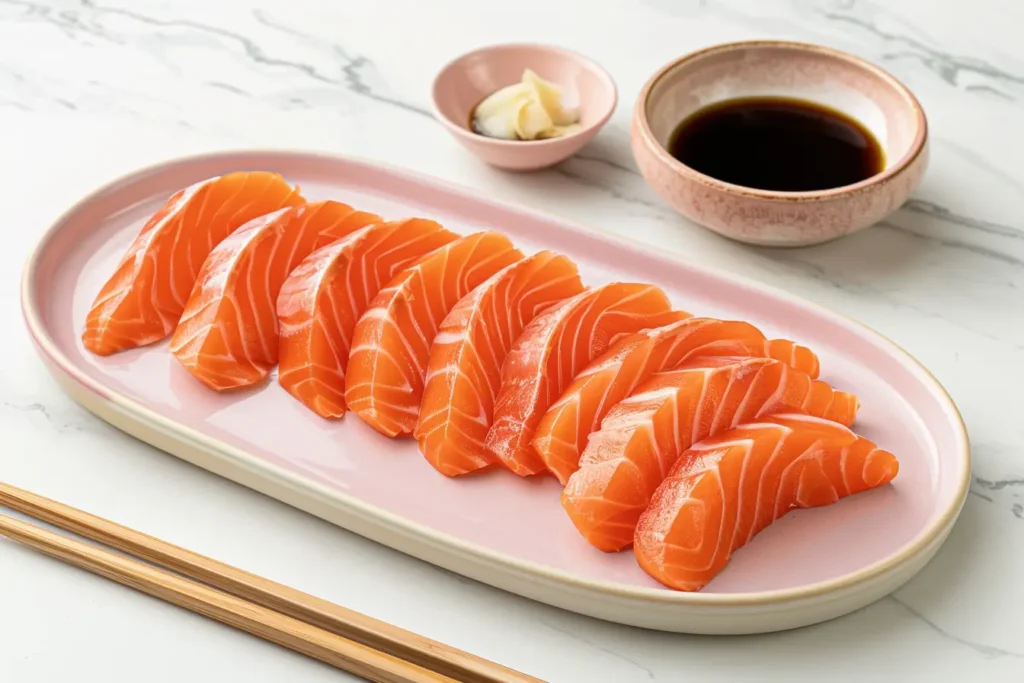
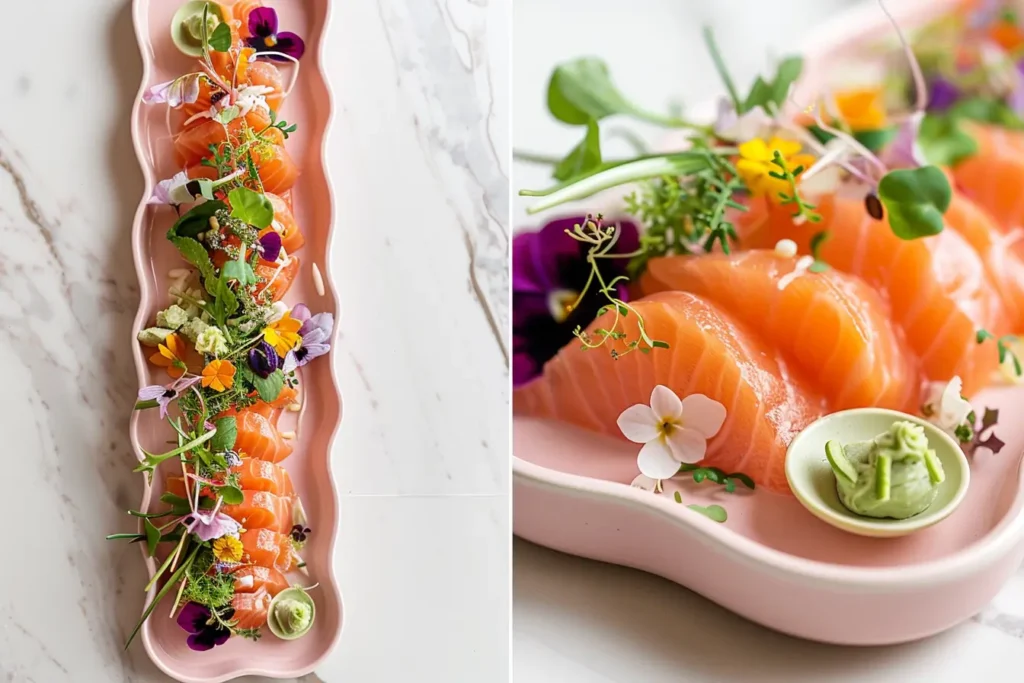
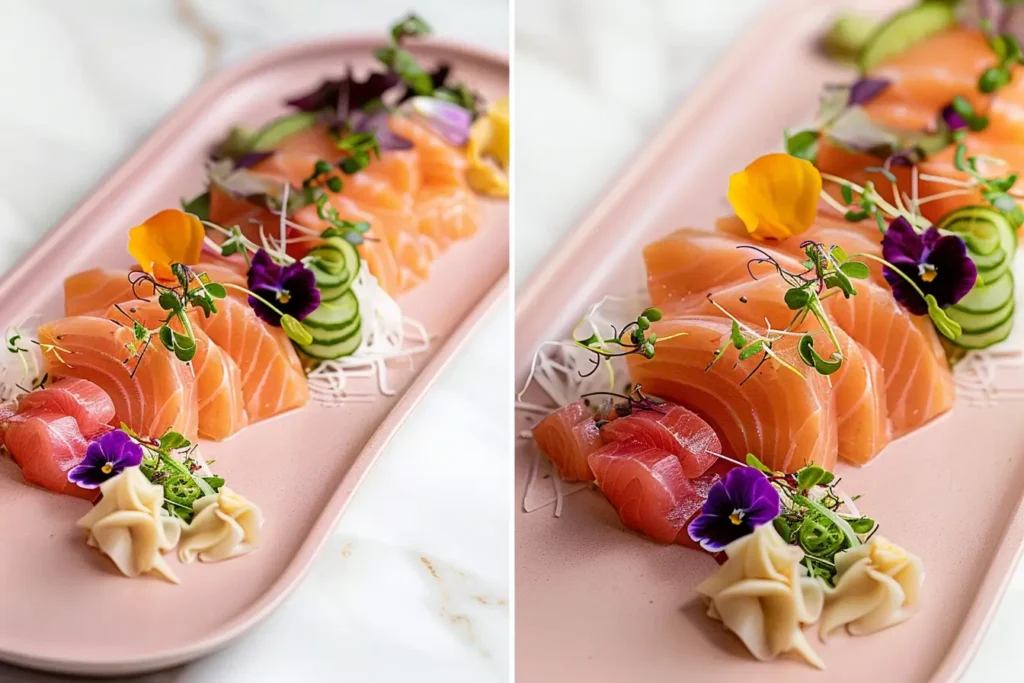
✔ Arrange the salmon slices in a slight overlap or a fan shape for a restaurant-style presentation.
✔ Place a small mound of wasabi on the side of the plate.
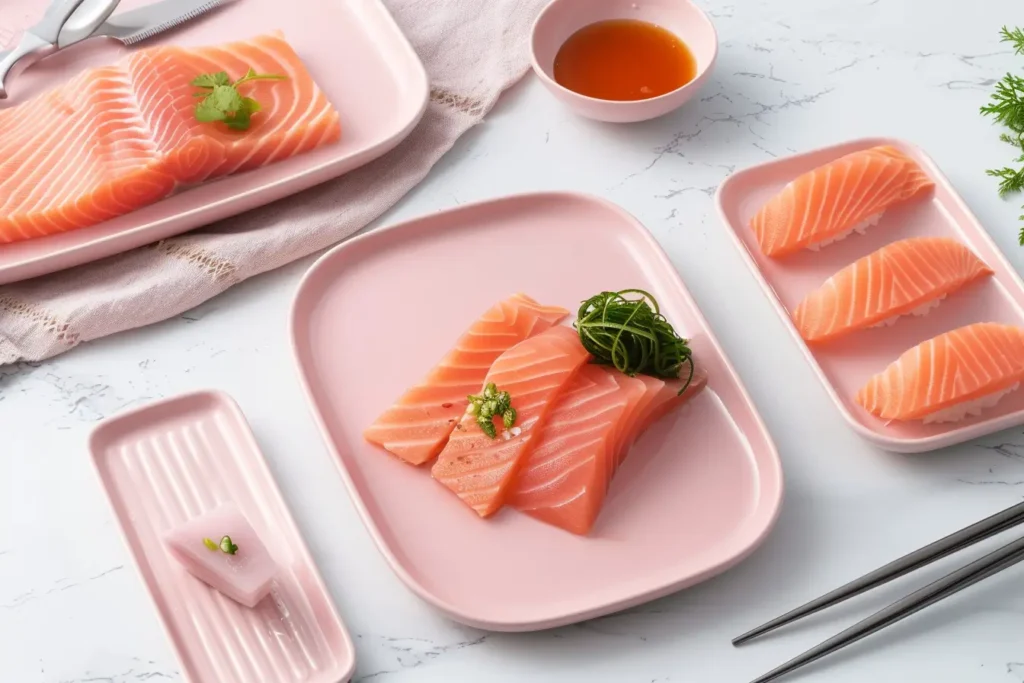
✔ Add a garnish of thinly sliced radish, shiso leaves, or microgreens for a pop of color.
✔ Serve with soy sauce, ponzu, or a light drizzle of yuzu juice for extra flavor.
📌 Pro Tip: For an extra elegant touch, chill your serving plate before arranging the sashimi—this keeps the fish cool and fresh while serving!
Step 6: Time to Enjoy!
And there you have it—perfectly sliced, restaurant-quality salmon sashimi, made at home! Serve it immediately with your favorite dipping sauce, and enjoy every melt-in-your-mouth bite.
🍣 Want to take it up a notch? Pair your sashimi with a simple cucumber salad, miso soup, or steamed rice for a full Japanese-style meal!
Additional Tips & Pairings to Elevate Your Salmon Sashimi Experience
Now that you’ve mastered the art of slicing and plating salmon sashimi, let’s take it to the next level! Whether you’re looking to pair it with the perfect side dish, store leftovers correctly, or customize the flavors to suit your taste, I’ve got you covered. Here are some additional tips to make your sashimi experience even better!
Perfect Pairings & Side Dishes
While salmon sashimi is delicious on its own, pairing it with the right sides and condiments enhances the flavors and creates a balanced meal. Here are some great options:
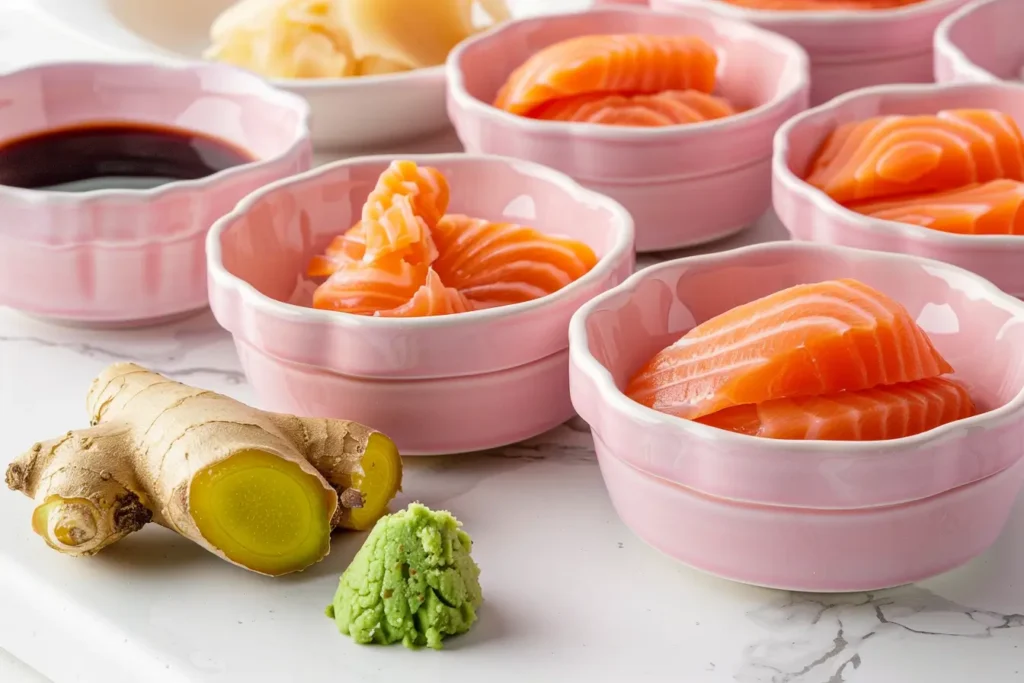
✔ Traditional Pairings – Serve with soy sauce, wasabi, and pickled ginger for a classic Japanese experience. The wasabi adds heat, while the ginger cleanses the palate between bites.
✔ Light & Refreshing Sides – A cucumber sunomono salad (Japanese vinegar-marinated cucumbers) adds a fresh, tangy contrast to the rich salmon.
✔ Hearty Accompaniments – If you want a more filling meal, pair your sashimi with steamed sushi rice or a warm bowl of miso soup for that comforting umami boost.
✔ Crunchy Add-Ons – Toasted sesame seeds, crispy shallots, or thinly sliced radish add a fun texture to your sashimi platter.
📌 Want to try something different? Pair salmon sashimi with a light citrus ponzu sauce for an added depth of flavor!
How to Store, Reheat & Make Ahead
Since sashimi is served raw, it’s best eaten fresh. But if you have leftovers, here’s how to store them properly:
✔ Refrigeration: Wrap leftover salmon sashimi tightly in plastic wrap, then place it in an airtight container. Store it in the coldest part of the fridge (ideally below 40°F). Consume within 24 hours for the best quality.
✔ Freezing: Freezing fresh salmon before slicing is fine, but never refreeze sashimi after it has been cut. The texture becomes mushy, and it loses its delicate flavor.
✔ Make-Ahead Tip: If you’re preparing sashimi for a gathering, slice the salmon just before serving to maintain freshness. Keep it chilled on a plate over ice if prepping in advance.
📌 Pro Tip: Never leave sashimi at room temperature for more than 2 hours—raw fish is highly perishable!
Creative Serving Ideas
Want to get creative with your salmon sashimi? Try these fun serving ideas:
✔ Sashimi Tacos: Wrap salmon sashimi in crispy seaweed sheets and top with avocado and spicy mayo for a hand-held sushi taco.
✔ Poke Bowl Twist: Serve sliced sashimi over a bed of sushi rice with edamame, seaweed salad, and a drizzle of sesame dressing.
✔ Carpaccio-Style: Arrange thin slices of sashimi on a plate and drizzle with yuzu soy sauce, a sprinkle of sesame seeds, and fresh microgreens for a delicate, refreshing appetizer.
✔ Spicy Kick: Love a bit of heat? Add a touch of sriracha or chili oil to your soy sauce for a spicy dipping option.
📌 Want to try another salmon dish? Check out this Salmon Sushi Bake for a warm, comforting take on sushi flavors!
How to Customize the Recipe
Everyone has their own flavor preferences, and salmon sashimi is super easy to customize! Here’s how you can adapt it to your taste:
✔ Lighter Option: Swap out soy sauce for ponzu sauce for a citrusy, low-sodium alternative.
✔ Richer Flavor: Add a drizzle of truffle oil or sesame oil over the sashimi for an extra depth of umami.
✔ Gluten-Free Alternative: Use tamari or coconut aminos instead of soy sauce.
✔ Spicier Version: Mix a little wasabi into your soy sauce for an extra fiery kick.
📌 Love exploring Japanese flavors? Learn more about sashimi and sushi variations in this guide from AllRecipes!
Common Mistakes & How to Avoid Them
Even with the best ingredients, small mistakes can affect the final result. Here’s what to watch out for:
❌ Cutting Against the Grain: Always slice against the grain of the fish—this ensures tender, smooth pieces instead of chewy ones.
❌ Using a Dull Knife: A sharp knife is essential for clean, even slices—otherwise, you risk tearing the delicate salmon.
❌ Overhandling the Fish: Touching the salmon too much warms it up and changes its texture. Use chopsticks or a fish spatula for careful handling.
❌ Skipping the Chilling Step: If the salmon isn’t chilled before slicing, the cuts won’t be as precise, and the fish may fall apart.
📌 Pro Tip: Keep your knife slightly damp between slices to prevent it from sticking to the salmon!
Final Thoughts
With these extra tips, you’re all set to take your homemade salmon sashimi to the next level! Whether you’re keeping it classic or experimenting with fun flavors and pairings, you’ll be slicing and plating sashimi like a pro in no time.
📌 Next Up: FAQs & Recipe Card – Everything You Need in One Place!
Frequently Asked Questions
Q1: Can I use regular salmon from the grocery store for sashimi?
No, only sashimi-grade salmon should be used for raw consumption. Grocery store salmon is not handled with raw consumption in mind and may contain parasites. Always buy from a trusted fish market or Japanese grocery store that sells sushi-grade fish.
Q2: How do I know if my salmon is fresh enough for sashimi?
Look for bright, vibrant orange flesh with no discoloration. It should have a clean, ocean-like scent (not fishy) and a firm texture that springs back when pressed. If it smells off or feels slimy, it’s not fresh enough for sashimi.
Q3: How thin should I slice my salmon for sashimi?
Traditional sashimi slices are about ¼ inch thick. If you’re making Hira-zukuri cuts (rectangular pieces), aim for uniform slices. If you’re trying Sogigiri (angled cuts), slice thinner at a 45-degree angle.
Q4: Can I freeze salmon before using it for sashimi?
Yes! Freezing sashimi-grade salmon at -4°F (-20°C) for at least 7 days kills parasites. Some high-quality fish is flash-frozen right after being caught, making it safe to eat raw. However, never refreeze thawed salmon—it will affect texture and safety.
Q5: What’s the best way to store leftover sashimi?
Sashimi is best eaten fresh, but if you must store it:
✔ Wrap it tightly in plastic wrap and place it in an airtight container.
✔ Store in the coldest part of the fridge (below 40°F) for no more than 24 hours.
✔ Do not freeze leftover sashimi—it won’t retain its texture once thawed.
Q6: What sauces go best with salmon sashimi?
Classic soy sauce & wasabi is always a great choice, but you can also try:
✔ Ponzu sauce (soy sauce + citrus) for a tangy twist.
✔ Yuzu soy sauce for a light, refreshing dip.
✔ Sesame oil & sea salt for a nutty, umami-packed alternative.
Looking for More Delicious Recipes?
If you love hearty meals, check out our Main Dishes collection—perfect for family dinners or special occasions. Or, if you’re craving something sweet, browse our Snacks, Desserts & Bites section for tasty treats. There’s always something new and exciting to cook!
Print
Salmon Sashimi Recipe – How to Make It Like a Pro at Home
- Total Time: 10 minutes
- Yield: 2 servings 1x
Description
Learn how to make restaurant-quality salmon sashimi at home with this easy step-by-step guide. From choosing the best sashimi-grade salmon to perfect slicing techniques, this recipe will help you master the art of sashimi with confidence.
Ingredients
For the Salmon Sashimi:
- 8 oz sashimi-grade salmon, chilled
- 1 tsp soy sauce (for dipping)
- ½ tsp wasabi (optional)
- ½ tsp ponzu sauce (optional)
- Garnishes: thinly sliced radish, shiso leaves, microgreens
For Serving:
- Soy sauce & wasabi (classic pairing)
- Ponzu sauce (for a citrusy twist)
- Chilled serving plate (to keep sashimi fresh)
Instructions
- Prepare the Salmon: Ensure the salmon is sashimi-grade and properly chilled. If frozen, thaw in the fridge overnight before slicing.
- Set Up Your Workspace: Use a sharp sashimi knife, a sturdy cutting board, and a damp paper towel to wipe the knife between slices.
- Trim & Clean: If the salmon has skin, carefully remove it with a sharp knife. Check for any pin bones and remove them with fish tweezers.
- Choose Your Cut: Decide between Hira-zukuri (rectangular slices) or Sogigiri (angled slices).
- Slice Like a Pro: Hold the knife at a 20-30 degree angle, then slice against the grain in one smooth stroke. Avoid sawing back and forth.
- Plate Beautifully: Arrange slices slightly overlapping on a chilled plate. Garnish with radish, shiso leaves, or microgreens for an elegant touch.
- Serve & Enjoy: Pair with soy sauce, wasabi, or ponzu sauce for dipping. Serve immediately for the freshest taste.
Notes
- For best results, always use sashimi-grade salmon.
- Keep your knife slightly wet between slices to ensure clean cuts.
- Never let sashimi sit at room temperature for more than 2 hours.
- Prep Time: 10 minutes
- Cook Time: N/A (No cooking required)
- Cuisine: Japanese
Nutrition
- Serving Size: ~4 oz per person
- Calories: ~180 per serving
- Fat: ~8g
- Carbohydrates: ~1g
- Protein: ~24g
- Cholesterol: ~35mg
Tried This Recipe?
Snap a photo and tag me on Instagram @RecipesFriday—I’d love to see your delicious creations!