My neighbor stopped by one afternoon, holding a package of duck breast with a puzzled look on his face.
“Hey, Ava, do you have to soak duck breast before cooking? I don’t want it to turn out tough or gamey.”
I laughed, remembering my own struggles with duck breast. The first time I cooked it, I treated it like chicken—straight to the pan, no prep beyond seasoning. Big mistake. Instead of a tender, flavorful meal, I ended up with something chewy, dry, and way too strong-tasting. That’s when I realized duck isn’t like other meats—it has its own set of rules.
So, do you really need to soak duck breast before cooking? Some people swear by brining or soaking in milk to remove gamey flavors, while others argue that proper cooking techniques make soaking unnecessary.
The truth? It depends on your duck, your method, and what kind of flavor and texture you’re after.
Before you start cooking, let’s break down the different soaking methods—brining, milk soaking, and dry-aging—to see whether they actually make a difference.
Table of Contents
Should You Soak Duck Breast Before Cooking? The Science & Methods
My neighbor’s question—“Do you have to soak duck breast before cooking?”—got me thinking. Some cooks insist that soaking is the secret to tender, flavorful duck, while others say it’s unnecessary if you cook it right. So, what’s the truth? Let’s break it down.
Why Do Some People Soak Duck Breast?
Soaking meat before cooking is a common practice for various reasons:
- To Remove Gamey Flavors: Wild duck, in particular, has a strong, earthy taste due to its diet. Some people soak it in milk or a mild brine to mellow out that flavor.
- To Improve Tenderness: Brining (soaking in a saltwater solution) helps retain moisture, keeping the meat juicy.
- To Draw Out Blood: This is especially relevant for wild-caught duck, where soaking in salted water or milk can remove excess blood, reducing any metallic taste.
But is soaking necessary, or is it just an extra step? That depends on your method and the type of duck you’re working with.
Comparing Soaking Methods: Which Works Best?
There are three main soaking techniques people use when preparing duck breast. Each method has pros and cons, and the right choice depends on your personal taste and cooking style.
1. Brining (Saltwater Solution) – Best for Moisture Retention
✔ How It Works: A simple mixture of salt and water (sometimes with added herbs or sugar) helps the meat retain moisture.
✔ Best For: Wild duck or store-bought duck breast that tends to dry out when cooked.
✔ Downside: Requires planning ahead (at least a few hours of soaking).
How to Brine Duck Breast:
- Mix 4 cups of water with ¼ cup of salt and optional flavorings like garlic or herbs.
- Submerge the duck breast in the brine and refrigerate for 2 to 12 hours.
- Rinse, pat dry, and cook as desired.
2. Milk Soaking – Best for Reducing Gamey Flavor
✔ How It Works: The natural enzymes in milk help break down proteins, making the meat more tender and mellowing strong flavors.
✔ Best For: Wild duck or anyone sensitive to gamey flavors.
✔ Downside: Less effective at retaining moisture than brining.
How to Soak Duck in Milk:
- Place duck breasts in a bowl of whole milk or buttermilk (enough to fully cover them).
- Refrigerate for at least 4 hours (or overnight for a stronger effect).
- Rinse, pat dry, and season before cooking.
3. Dry Aging – Best for Intense Flavor & Crispier Skin
✔ How It Works: Leaving the duck breast uncovered in the fridge allows the outer layer to dry, concentrating flavor and improving texture.
✔ Best For: Farmed duck breast, when you want restaurant-quality crisp skin and rich flavor.
✔ Downside: Takes longer (1-3 days) and requires careful refrigeration.
How to Dry Age Duck Breast:
- Place the duck breast on a wire rack in the fridge, uncovered, for 24-72 hours.
- The skin will dry out, helping it crisp up beautifully when cooked.
Is Soaking Necessary? Here’s the Bottom Line
- If you’re cooking wild duck → Soaking in milk or brine can help remove strong flavors.
- If you want extra moisture → Brining is the best option.
- If you’re after restaurant-quality texture → Dry aging gives the best results.
- If you’re using store-bought, farmed duck → Soaking isn’t necessary—proper cooking techniques matter more.
Now that you know the pros and cons of soaking, let’s move on to how to prepare duck breast before cooking—including scoring the skin, seasoning, and other must-know techniques.
How to Prepare Duck Breast for Cooking (Scoring, Seasoning & More)
Now that we’ve explored whether soaking duck breast is necessary, let’s focus on the most important pre-cooking steps to ensure juicy, flavorful meat with crispy, golden skin. Whether you decide to soak it or not, proper preparation makes all the difference.
Essential Tools & Equipment for Cooking Duck Breast
Before you start, gather these key kitchen tools:
✔ A sharp knife – Needed for scoring the skin to render fat properly.
✔ Cutting board – Preferably one with a juice groove to prevent mess.
✔ Paper towels – Crucial for patting the duck dry before cooking.
✔ Cast-iron skillet or heavy pan – Helps achieve a perfectly seared, crispy skin.
✔ Tongs – Makes flipping and handling the duck easier.
✔ Instant-read thermometer – Ensures your duck is cooked to the perfect temperature.
🔗 Related: How to Cook Duck Breast with Sauerkraut – A delicious variation of duck breast with bold flavors.
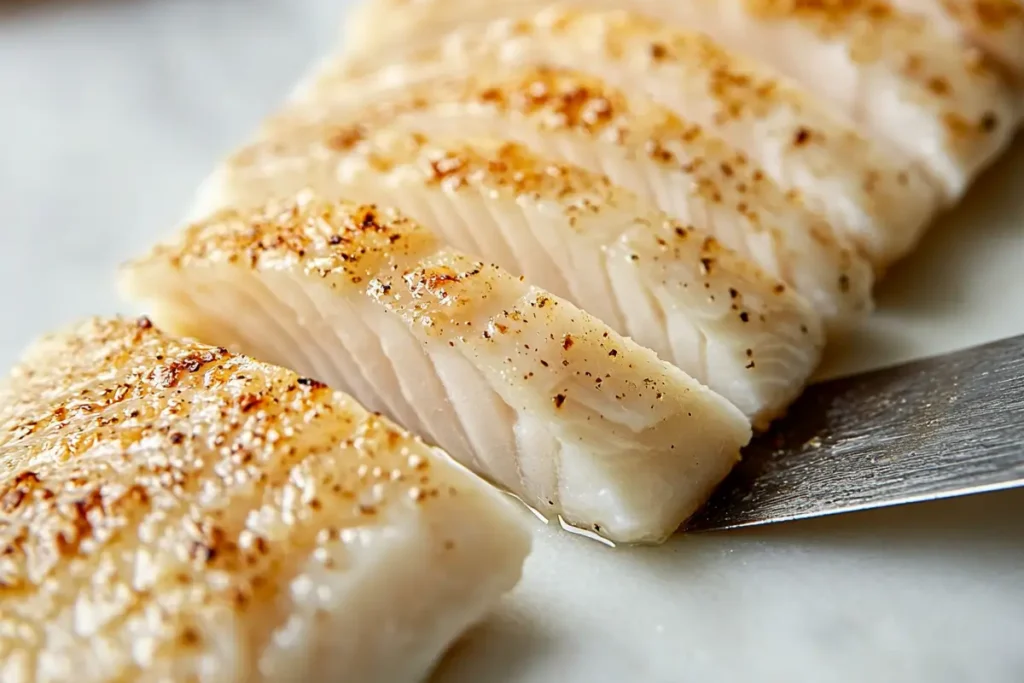
Step 1: Scoring the Duck Breast for Crispy Skin
Scoring the skin is a must when cooking duck breast. It allows the thick layer of fat beneath the skin to render out while cooking, resulting in crispy, golden-brown skin instead of a greasy mess.
🔹 How to Score Duck Breast Properly:
- Place the duck breast skin-side up on a cutting board.
- Use a sharp knife to make shallow cuts in a crisscross pattern, creating small diamond shapes.
- Be careful not to cut into the meat—only score through the skin and fat layer.
Pro Tip: The closer the cuts, the crispier the skin will be.
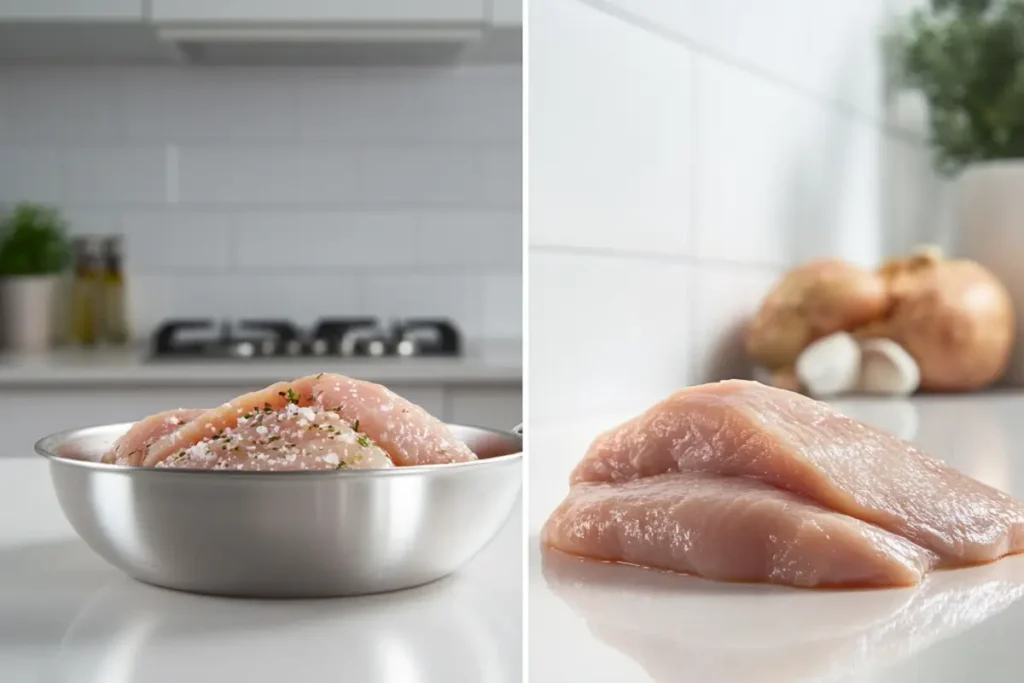
Step 2: Patting the Duck Dry & Seasoning
Moisture is the enemy of crispy skin! Before seasoning, pat the duck breast completely dry with paper towels.
🔹 Simple but Effective Seasoning:
- Salt & Pepper: Classic and effective. Enhances natural flavors.
- Garlic & Herbs: Thyme, rosemary, or a touch of garlic powder pair well.
- Citrus Zest: A bit of orange or lemon zest brightens the flavor.
Optional: If you’ve brined the duck, go easy on the salt since it has already absorbed some.
Step 3: Letting the Duck Rest Before Cooking
After seasoning, let the duck breast sit at room temperature for 15–20 minutes. Why? Cooking cold duck straight from the fridge can result in uneven cooking.
✔ This allows the meat to relax, leading to a more tender bite.
✔ Helps the seasoning penetrate for better flavor.
Step 4: Choosing the Right Cooking Method
Now that your duck breast is prepped, the next step is deciding how you want to cook it. Should you pan-sear, roast, or even sous vide? Each method has its own benefits, and in the next section, we’ll walk through the best techniques for achieving restaurant-quality duck breast at home.
Step-by-Step Guide to Cooking Perfect Duck Breast
Now that your duck breast are prepped and ready, it’s time for the best part—cooking! Whether you soaked it or skipped that step, proper technique is the key to a juicy, flavorful, and perfectly crispy duck breast. Follow these steps carefully, and you’ll have a restaurant-quality dish right at home.
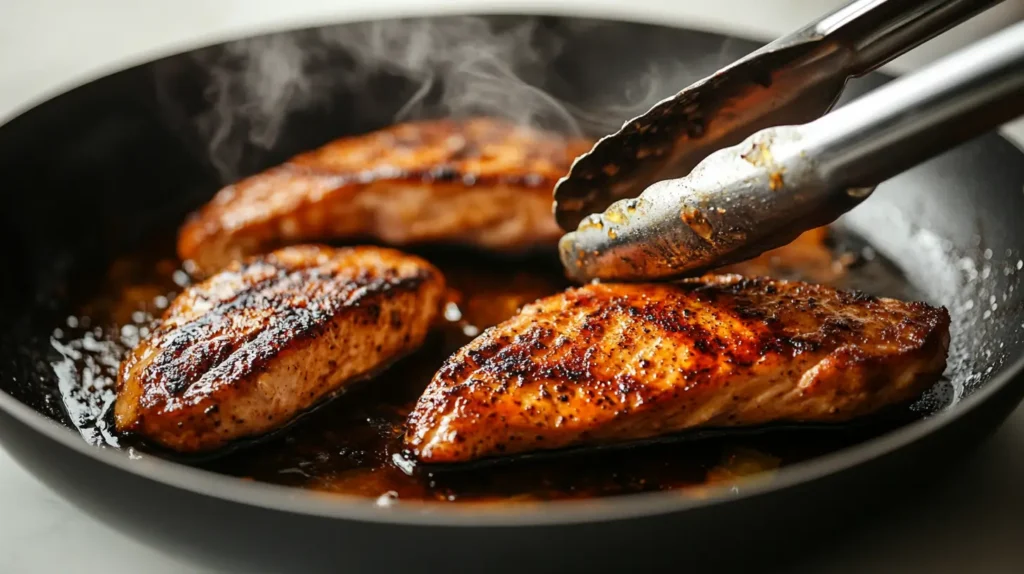
Step 1: Start with a Cold Pan for Crispy Skin
Unlike most meats that go into a preheated pan, duck breast should always start in a cold pan. This allows the fat to slowly render out, giving you that golden, crispy skin without overcooking the meat.
✔ Place the duck breast skin-side down in a dry, cold cast-iron or heavy-bottomed pan.
✔ Turn the heat to medium-low and let the fat slowly render.
✔ Do not move the duck for at least 5-7 minutes. Let it cook undisturbed until the skin turns deep golden brown.
Pro Tip: If there’s too much fat collecting in the pan, carefully spoon some out into a heat-safe container and save it for cooking potatoes or vegetables later!
Step 2: Flip & Sear the Meat Side
Once the skin is beautifully crisp, it’s time to cook the other side.
✔ Flip the duck breast meat-side down and increase the heat to medium-high.
✔ Cook for another 2-3 minutes until the meat is lightly browned.
✔ For medium-rare, check if the internal temperature reads 130°F (54°C) using an instant-read thermometer.
For medium: Cook to 140°F (60°C).
For well-done: (Not recommended, as duck breast is best pink inside), cook to 155°F (68°C).
Step 3: Let the Duck Rest
Just like steak, duck breast needs to rest before slicing. If you cut into it too soon, all the juices will run out, leaving it dry.
✔ Remove the duck breast from the pan and place it on a plate.
✔ Tent it loosely with foil and let it rest for 5-7 minutes.
✔ The residual heat will bring the internal temperature up a few degrees.
Pro Tip: Resting the duck also allows the juices to redistribute, making every bite tender and flavorful.
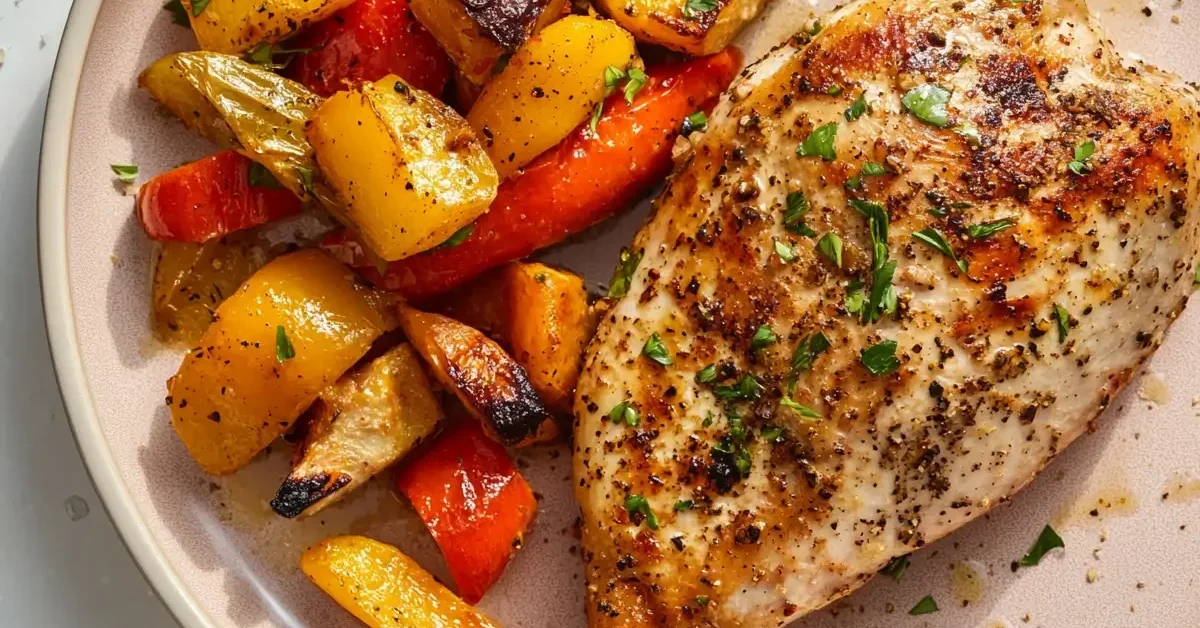
Step 4: Slice & Serve
Now for the moment of truth—slicing and serving your perfectly cooked duck breast!
✔ Use an sharp knife and cut the duck breast against the grain into thin slices.
✔ Serve with your favorite sides—duck pairs beautifully with roasted vegetables, mashed potatoes, or a tangy fruit sauce like orange or cherry glaze.
Optional: Drizzle a little of the rendered duck fat over the top for extra richness.
What’s Next?
Now that you’ve mastered cooking duck breast, let’s talk about storage, reheating, and serving ideas to make the most out of your meal!
Additional Tips, Serving Suggestions & Storage Guide
Now that you’ve perfected the art of cooking duck breast, let’s talk about how to elevate your dish even further. From the best side dishes to smart storage techniques, these expert tips will help you make the most of your meal.
Perfect Pairings: What to Serve with Duck Breast
Duck breast has a rich, slightly sweet flavor that pairs beautifully with a variety of sides. Here are some delicious options:
✔ Classic & Elegant: Serve duck breast with a red wine reduction sauce and roasted potatoes for a sophisticated meal.
✔ Sweet & Tangy: Pair it with a cherry or orange glaze to balance the richness of the meat.
✔ Light & Refreshing: A simple arugula salad with balsamic dressing adds a fresh contrast.
✔ Asian-Inspired: Try serving it with steamed jasmine rice and a soy-ginger glaze.
Pro Tip: A tangy fruit glaze, like cherry or pomegranate, brings out the richness of duck beautifully!
How to Store & Reheat Duck Breast Without Losing Flavor
Got leftovers? No problem! Here’s how to store and reheat duck breast properly to maintain its taste and texture.
Storing Cooked Duck Breast:
✔ Refrigeration: Place the duck breast in an airtight container and store it in the fridge for up to 3 days.
✔ Freezing: If you need to keep it longer, wrap it tightly in plastic wrap, then place it in a freezer-safe bag. It can be stored for up to 3 months.
Reheating Without Drying Out:
✔ Oven Method (Best for Preserving Texture):
- Preheat the oven to 300°F (150°C).
- Place the duck on a baking sheet and cover it loosely with foil.
- Heat for 10-12 minutes until warm.
✔ Stovetop Method (Quick & Easy):
- Slice the duck and reheat it in a pan over medium-low heat with a bit of butter.
- Flip occasionally until warmed through (about 3-4 minutes).
✔ Microwave Method (Not Recommended):
- If necessary, reheat at 50% power in 30-second intervals.
Avoid overheating: Duck breast are best when reheated gently to maintain its juiciness.
Creative Ways to Use Leftover Duck Breast
If you have extra duck breast, don’t let it go to waste! Here are some fun ways to repurpose it:
✔ Duck Tacos: Slice the duck thinly and serve it in soft tortillas with a tangy slaw.
✔ Duck Fried Rice: Chop up the duck and toss it into a quick stir-fry with rice and veggies.
✔ Duck & Brie Sandwich: Layer sliced duck with brie cheese and caramelized onions on a crusty baguette.
✔ Salad Topper: Add cold duck slices to a mixed greens salad with a citrus vinaigrette.
Looking for more inspiration? Check out How to Make Duck Breasts More Tender for extra tips on perfecting your dish.
More Duck Recipe Inspiration
If you loved this dish, you might enjoy trying other delicious ways to prepare duck breast. Here’s a great external resource:
📌 Duck with Honey, Soy, and Ginger – AllRecipes – A flavorful variation with an Asian-inspired glaze.
Now that you’ve mastered duck breast, let’s finish off with some frequently asked questions to clear up any last-minute doubts!
Frequently Asked Questions
Q1: Do you have to soak duck breast before cooking?
Not necessarily! Soaking duck breast is optional and depends on the type of duck and your flavor preferences. Brining helps retain moisture, milk soaking reduces gamey flavors, and dry-aging intensifies the taste. If you’re using farmed duck, proper cooking techniques matter more than soaking.
Q2: What is the best way to tenderize duck breast?
The best way to tenderize duck breast is to score the skin, cook it low and slow on the skin side, and let it rest before slicing. If you’re dealing with wild duck, a mild brine or milk soak can help break down tough fibers and mellow the flavor.
Q3: How long should I soak duck breast if I choose to do it?
It depends on the soaking method:
Brine: 2 to 12 hours in the fridge.
Milk soak: At least 4 hours, up to overnight.
Dry aging: 24 to 72 hours in the fridge (uncovered on a wire rack).
Q4: Can I cook duck breast straight from the fridge?
It’s best to let duck breast rest at room temperature for 15-20 minutes before cooking. This prevents the meat from seizing up in the pan and ensures more even cooking.
Q5: What’s the secret to getting crispy duck skin?
The key to crispy duck skin is to:
✔ Score the skin in a crisscross pattern.
✔ Start in a cold, dry pan and render the fat slowly over medium-low heat.
✔ Avoid flipping too soon—let the skin crisp up before turning.
Q6: What are the best sauces to pair with duck breast?
A: Duck pairs beautifully with fruit-based sauces like orange, cherry, or cranberry, as well as balsamic reductions and Asian-style glazes (soy, honey, and ginger).
Love this recipe? Check out more delicious dishes:
🔗 Main Dishes Collection – Hearty, flavorful meals for any occasion.
🔗 Snacks, Desserts & Bites – Sweet and savory treats to complement your main course.

Pan-Seared Duck Breast with Crispy Skin
- Total Time: 20 minutes
- Yield: 2 servings 1x
Description
Learn how to cook duck breast perfectly with a crispy golden skin and juicy, tender meat. This step-by-step guide walks you through the best cooking techniques, from scoring to searing, to get restaurant-quality results at home.
Ingredients
-
For the Duck Breast:
- 2 duck breasts, skin-on
- 1 tsp salt
- ½ tsp black pepper
- 1 tbsp fresh thyme (optional)
For Cooking:
- 1 heavy-bottomed cast-iron skillet
- Paper towels (for drying)
- Sharp knife (for scoring)
For Serving (Optional):
- 2 tbsp orange marmalade or balsamic glaze
- Roasted potatoes or arugula salad
Instructions
- Score the Skin: Using a sharp knife, lightly score the skin of the duck breast in a crisscross pattern. Be careful not to cut into the meat.
- Pat Dry & Season: Use paper towels to pat the duck completely dry. Season both sides with salt, pepper, and thyme.
- Start in a Cold Pan: Place the duck breast skin-side down in a cold, dry cast-iron skillet. Turn heat to medium-low and let the fat slowly render for 5-7 minutes.
- Flip & Sear: Once the skin is golden and crispy, flip the duck and cook for 2-3 minutes on the meat side.
- Check Temperature: Use an instant-read thermometer to check for 130°F (54°C) for medium-rare or 140°F (60°C) for medium.
- Rest & Slice: Let the duck rest for 5-7 minutes before slicing. Serve with your choice of sauce and sides.
Notes
✔ For extra-crispy skin: Dry-age the duck breast uncovered in the fridge for 24-48 hours.
✔ To store leftovers: Keep in an airtight container for up to 3 days in the fridge or freeze for up to 3
- Prep Time: 10 minutes
- Cook Time: 10 minutes
- Cuisine: French, American
Nutrition
- Serving Size: 1 duck breast
- Calories: ~350 per serving
- Fat: ~18g
- Carbohydrates: ~2g
- Protein: ~32g
- Cholesterol: ~85mg