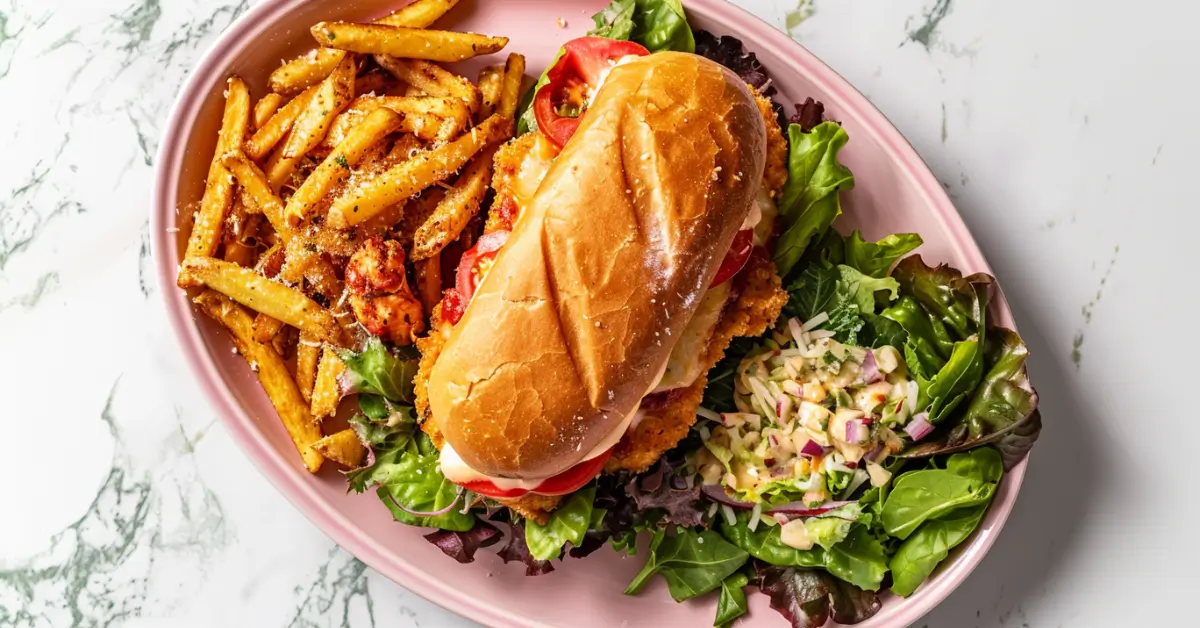
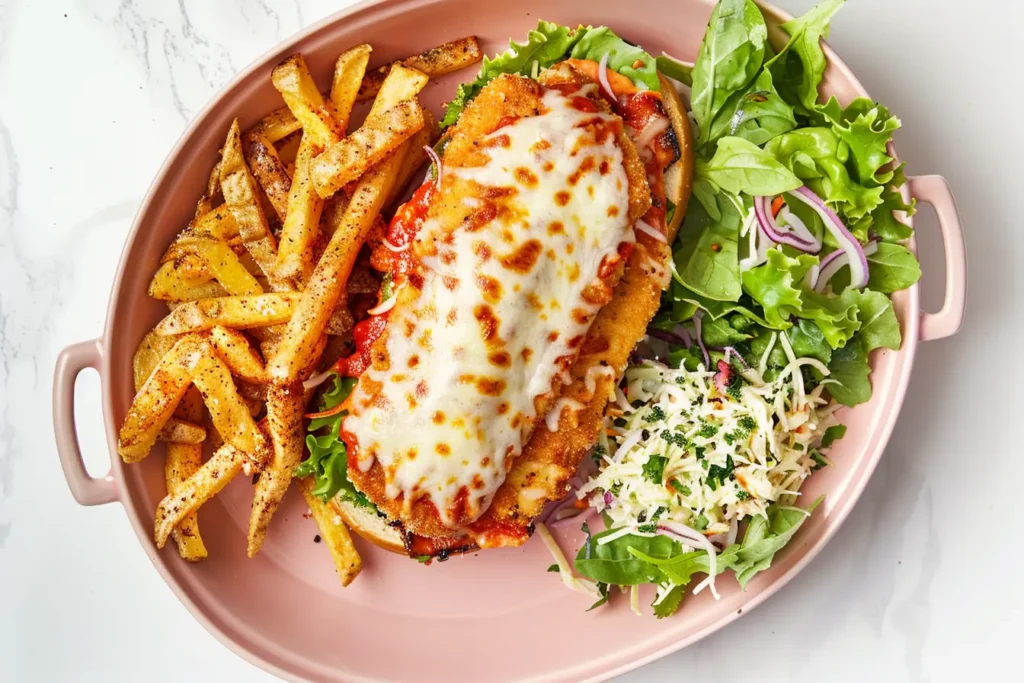
A chicken parm sandwich is everything I love about chicken parmesan, but even better—crispy, cheesy, and handheld! The first time I made one, I wasn’t expecting much. I figured it was just an easy version of the real thing. But after that first bite? Game changer.
This sandwich is an instant favorite in my house. Whether it’s a cozy weeknight meal or a game-day indulgence, it always hits the spot. And the best part? It’s easier than you think—just follow a few simple tricks.
Before we dive into the step-by-step process, let’s talk about what makes a chicken parm sandwich truly outstanding. From choosing the best ingredients to the secret to a crispy, golden-brown crust, I’ll walk you through everything you need to know to make this sandwich better than your favorite restaurant’s version.
Table of Contents
Why This Chicken Parm Sandwich Stands Out
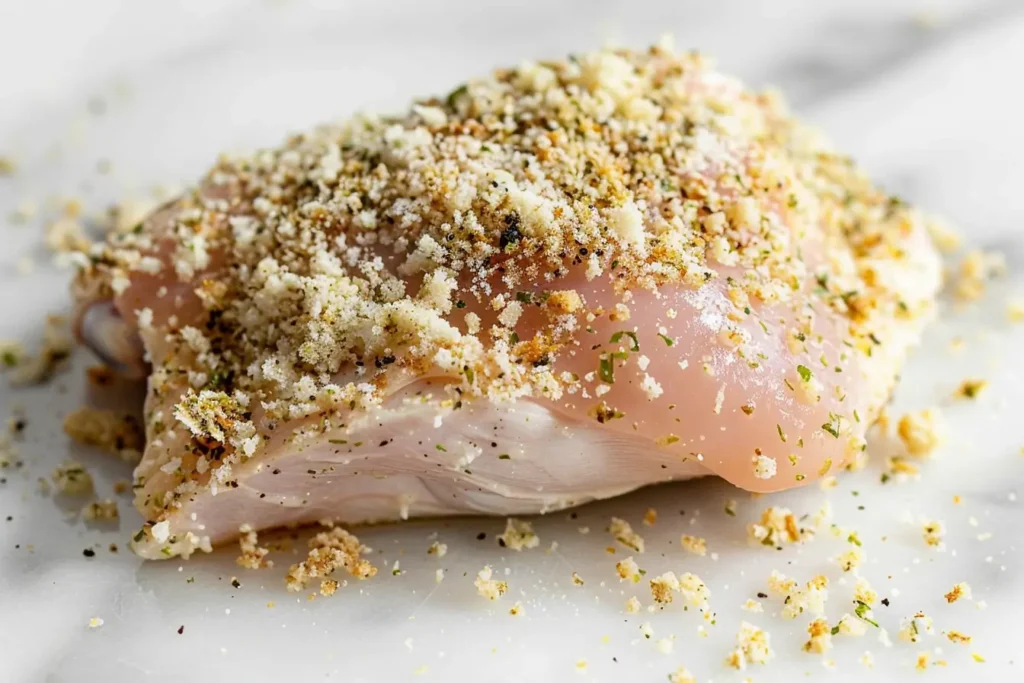
Ever wondered why some chicken parm sandwiches taste absolutely incredible while others fall flat? The difference comes down to a few simple but crucial choices—the right cut of chicken, the perfect breading technique, and the best cheese and bread pairings. Get these right, and you’ll have a crispy, cheesy masterpiece. Let’s break it all down!
Choosing the Best Chicken: Breast vs. Thigh
When it comes to making the best chicken parm sandwich, one of the first decisions you’ll need to make is chicken breast vs. chicken thigh. Both have their pros and cons:
✔ Chicken Breast – Leaner, more traditional, and firms up well when breaded and fried. It offers a classic texture and absorbs marinara beautifully.
✔ Chicken Thigh – More flavorful and juicier, but slightly fattier. While less traditional, it stays incredibly moist even after frying.
Best choice? If you want the classic restaurant-style crispiness, go with thinly pounded chicken breast. If you prefer extra juiciness, opt for boneless chicken thighs—just be prepared for a slightly richer, less uniform texture.
The Key to a Crispy, Golden-Brown Breading
There’s nothing worse than soggy breading on a chicken parm sandwich. If you want that perfect golden crunch, follow these three essential steps:
🔹 Double Dredge for Extra Crispiness – Coat the chicken in flour → egg wash → seasoned breadcrumbs → repeat egg wash and breadcrumbs. This double layer locks in maximum crunch.
🔹 Use Panko & Parmesan in the Breading – Classic Italian breadcrumbs are fine, but panko mixed with grated Parmesan takes the texture to the next level.
🔹 Fry at the Right Temperature (350°F/175°C) – Too hot, and the breading burns before the chicken cooks. Too cool, and it soaks up excess oil. A deep-fry or shallow pan-fry works best.
Pro Tip: Let the breaded chicken rest for 10 minutes before frying—this helps the coating stick and prevents it from falling apart!
Mozzarella vs. Parmesan – Which Cheese Works Best?
No chicken parm sandwich is complete without melty, gooey cheese. But should you use mozzarella or Parmesan (or both)?
🧀 Mozzarella (Best for Melt Factor) – Classic choice for a stretchy, gooey bite. Always use fresh mozzarella slices instead of pre-shredded for the best melt.
🧀 Parmesan (Best for Flavor Boost) – Sharp, salty, and adds a nutty depth. While it doesn’t melt well, a sprinkle of Parmesan over the mozzarella gives an extra punch of savory goodness.
💡 The Perfect Combo? Use mozzarella for meltability and grated Parmesan in the breading + a light sprinkle on top after baking.
Best Bread Choices: Hoagie Rolls vs. Brioche Buns vs. Ciabatta
Your chicken parm sandwich deserves the best bread. The wrong choice can lead to sogginess or overpower the flavors. Here’s a quick guide:
🥖 Hoagie Rolls (Best Classic Choice) – Holds up well to saucy, cheesy toppings without falling apart. Soft inside, slightly crisp outside.
🍞 Brioche Buns (For a Buttery Upgrade) – Richer, softer, and adds a slightly sweet contrast to the marinara’s acidity. Best toasted!
🍞 Ciabatta (For an Artisan Touch) – Has a chewy, rustic texture, which can make for a heartier sandwich. Toast well to prevent toughness.
✔ Best Pick? Hoagie rolls are the gold standard, but if you love extra buttery goodness, go for brioche. If you want a chewier, more gourmet experience, ciabatta is your go-to.
Now that we’ve covered the perfect chicken, best breading technique, ideal cheese, and top bread choices, you’re ready to create the ultimate crispy, cheesy, flavor-packed chicken parm sandwich.
But before we get cooking, let’s talk prep! The right ingredients and setup can make all the difference. Up next, we’ll go over everything you need to get started—plus a few pro tips to guarantee success!
Pre-Cooking Guide: Ingredients & Prep Tips

Before we dive into cooking, let’s make sure you have everything prepped for success. A well-prepared chicken parm sandwich isn’t just about frying up a crispy cutlet—it’s about getting the details right from the very beginning. From choosing the right ingredients to properly preparing the chicken, these steps will ensure your sandwich is crispy, juicy, and packed with flavor every time.
Essential Ingredients for the Best Chicken Parm Sandwich
A great chicken parm sandwich starts with high-quality ingredients. Here’s what you’ll need:
Chicken:
✔ Boneless, skinless chicken breasts – Pound them to an even thickness for even cooking.
✔ Alternative: Boneless chicken thighs for extra juiciness, but expect a richer taste.
Breading:
✔ Italian-style breadcrumbs – Adds traditional flavor.
✔ Panko breadcrumbs – For a lighter, crispier crunch.
✔ Grated Parmesan cheese – Mix this into the breading for extra umami.
Cheese:
✔ Fresh mozzarella slices – Melts beautifully for that perfect stretch.
✔ Parmesan cheese – Adds sharpness and depth (great for sprinkling on top).
Sauce:
✔ Homemade marinara (or a high-quality store-bought option like Rao’s).
✔ Optional: Add a pinch of red pepper flakes for subtle heat.
Bread:
✔ Italian hoagie rolls – Classic choice, holds up well to sauce.
✔ Brioche buns – A softer, buttery option.
✔ Ciabatta bread – For a more rustic bite.
Pro Tip: Lightly toast your bread before assembling to prevent sogginess and enhance flavor.
Prepping the Chicken for Maximum Flavor & Crispiness
Even the best ingredients won’t shine if the chicken isn’t properly prepared. Follow these steps to ensure a juicy interior with a perfectly crispy coating.
1️⃣ Pound the Chicken Evenly
🔹 Place the chicken breast between two sheets of parchment paper or plastic wrap.
🔹 Use a meat mallet or rolling pin to pound it to about ½-inch thickness. This ensures it cooks evenly and stays tender.
2️⃣ Season Generously
🔹 Salt & Pepper – Always season both sides before breading.
🔹 Garlic Powder, Onion Powder, & Dried Basil – Adds depth to the breading.
🔹 Paprika (Optional) – Enhances color and a slight smokiness.
3️⃣ The Secret to a Perfectly Crisp Breading
To get that golden-brown, crispy coating, follow this step-by-step dredging method:
✔ Step 1: Dredge the chicken in all-purpose flour (this helps the egg stick).
✔ Step 2: Dip into a well-beaten egg mixture (ensures the breadcrumbs adhere).
✔ Step 3: Coat generously in a breadcrumb + Parmesan mixture.
✔ Step 4 (Optional, but HIGHLY recommended): Repeat egg + breadcrumb steps for a double coating to maximize crunch.
Pro Tip: Let the breaded chicken rest on a wire rack for 10 minutes before frying. This helps the coating stick better, preventing it from falling off while cooking.
Alternative Preparation Method: Can You Boil Chicken for This Recipe?
If frying isn’t your thing or you’re looking for a healthier alternative, you might wonder:
“Can I use boiled chicken for a chicken parm sandwich?”
While boiled chicken is great for shredded sandwiches (like BBQ chicken), it’s not ideal for chicken parm because you’ll lose that essential crispy texture. However, if you prefer a lower-fat option, consider these alternatives:
✔ Baking: Coat the chicken as usual and bake at 425°F (218°C) for 20-25 minutes, flipping halfway.
✔ Air-Frying: Preheat to 375°F (190°C) and cook for 12-15 minutes, flipping halfway for an ultra-crispy texture.
🔗 Want to learn more about boiling chicken? Check out How Long to Boil Chicken? for a guide on cooking chicken perfectly for other recipes.
Now that the ingredients are ready, the chicken is prepped, and you know your cooking options, we’re almost there! Next up: frying, baking, and assembling the ultimate chicken parm sandwich.
Step-by-Step Recipe Guide
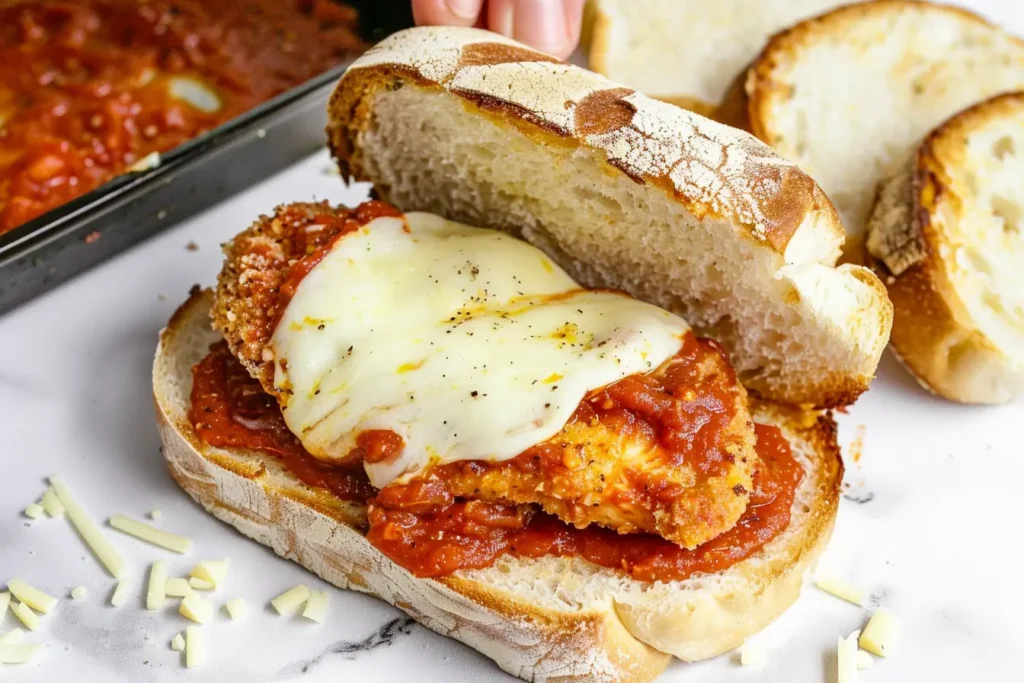
Now that all the prep work is done, it’s time to bring everything together and make the perfect chicken parm sandwich. Follow these step-by-step instructions for a crispy, cheesy, and flavor-packed sandwich that tastes like it came straight from an Italian kitchen.
Step 1: Prepare the Breading Station
Before cooking, set up your breading station. Having everything ready before you start will ensure a smooth, mess-free process.
🔹 Flour Bowl: Fill a shallow dish with all-purpose flour, seasoned with salt, pepper, garlic powder, and a pinch of paprika for extra flavor.
🔹 Egg Wash Bowl: Whisk together two eggs and a tablespoon of milk or water in a separate bowl. This helps the breading stick.
🔹 Breadcrumb Mixture: In a third dish, combine Italian-style breadcrumbs, Panko breadcrumbs, and grated Parmesan cheese for extra crunch and umami.
Pro Tip: Use one hand for wet ingredients (egg wash) and the other for dry (flour & breadcrumbs) to keep things clean and avoid clumping.
Step 2: Dredge and Double-Coat the Chicken
For that golden, crispy crust, follow this order:
✔ Dredge the chicken in the seasoned flour, coating both sides completely. Shake off excess.
✔ Dip into the egg wash, ensuring full coverage for better breadcrumb adhesion.
✔ Coat generously with breadcrumbs, pressing gently so they stick.
✔ Repeat the egg wash and breadcrumb steps for a double-coating (highly recommended for maximum crunch).
Pro Tip: Let the breaded chicken rest for 10 minutes before frying—this helps the coating adhere better and prevents it from falling off.
Step 3: Fry, Bake, or Air-Fry – Best Cooking Methods
Now, let’s cook that crispy, golden chicken parm cutlet! Choose your preferred method:
🔹 Frying (Best for Classic Crispiness)
✔ Heat ½ inch of oil in a large skillet over medium-high heat (350°F/175°C).
✔ Fry the chicken for 3-4 minutes per side, until golden brown and fully cooked (165°F internal temperature).
✔ Transfer to a wire rack (not paper towels!) to keep the coating crispy.
🔹 Baking (Healthier Alternative, Still Crispy!)
✔ Preheat oven to 425°F (218°C).
✔ Place breaded chicken on a greased baking sheet.
✔ Lightly spray with oil and bake for 20-25 minutes, flipping halfway.
🔹 Air-Frying (Quick & Crisp!)
✔ Preheat air fryer to 375°F (190°C).
✔ Lightly spray the basket with oil and place chicken inside.
✔ Air-fry for 12-15 minutes, flipping halfway through.
Pro Tip: For the best crunch, always let the fried chicken rest for a few minutes before assembling the sandwich.
Step 4: Toasting the Bread for Maximum Flavor
A chicken parm sandwich isn’t just about the chicken—the bread matters too! Lightly toasting your bun prevents sogginess and adds an extra layer of texture.
🔹 Spread softened butter (or garlic butter) on both sides of the bun.
🔹 Toast in a skillet over medium heat until golden brown, about 1-2 minutes per side.
🔹 Alternative: Place under the broiler for 30-60 seconds, watching closely to avoid burning.
Pro Tip: A light sprinkle of garlic powder and Parmesan on the buttered bread adds a delicious extra kick.
Step 5: Assembling the Ultimate Chicken Parm Sandwich
Now for the fun part—putting it all together!
1️⃣ Spread a generous layer of warm marinara sauce over the bottom bun—just enough to add flavor without making it soggy.
2️⃣ Gently place your crispy, golden-brown chicken cutlet on top, feeling that perfect crunch as it settles into the sauce.
3️⃣ Lay down two slices of fresh mozzarella, letting them drape over the chicken, ready to melt into gooey perfection.
4️⃣ Place under the broiler for 30 seconds (or use a kitchen torch) until the cheese is bubbling and irresistibly melty.
5️⃣ Sprinkle grated Parmesan and fresh basil over the top for an extra punch of flavor.
6️⃣ Crown it with the top bun, press lightly, and get ready for the best bite of your life!
Pro Tip: Love extra sauce? Spoon a little more marinara on top of the cheese before broiling—it melts into the chicken beautifully!
How to Keep Your Chicken Parm Sandwich from Getting Soggy
Nobody likes a soggy sandwich! Here’s how to keep it crispy until the last bite:
✔ Toast the bread first – This creates a barrier that prevents the sauce from soaking in.
✔ Add sauce to the bun, not the chicken – This keeps the chicken from getting soft too soon.
✔ Eat immediately – The longer it sits, the softer the bread will get.
Pro Tip: If you need to make it ahead, store the chicken and bread separately, then assemble just before eating.
And just like that—you’ve made the ultimate chicken parm sandwich! With its crispy, golden crust, melty cheese, and perfectly toasted bread, this sandwich is a game-changer for weeknight dinners, game-day snacks, or just a satisfying meal anytime.
Serving Ideas, Storage & Bonus Tips
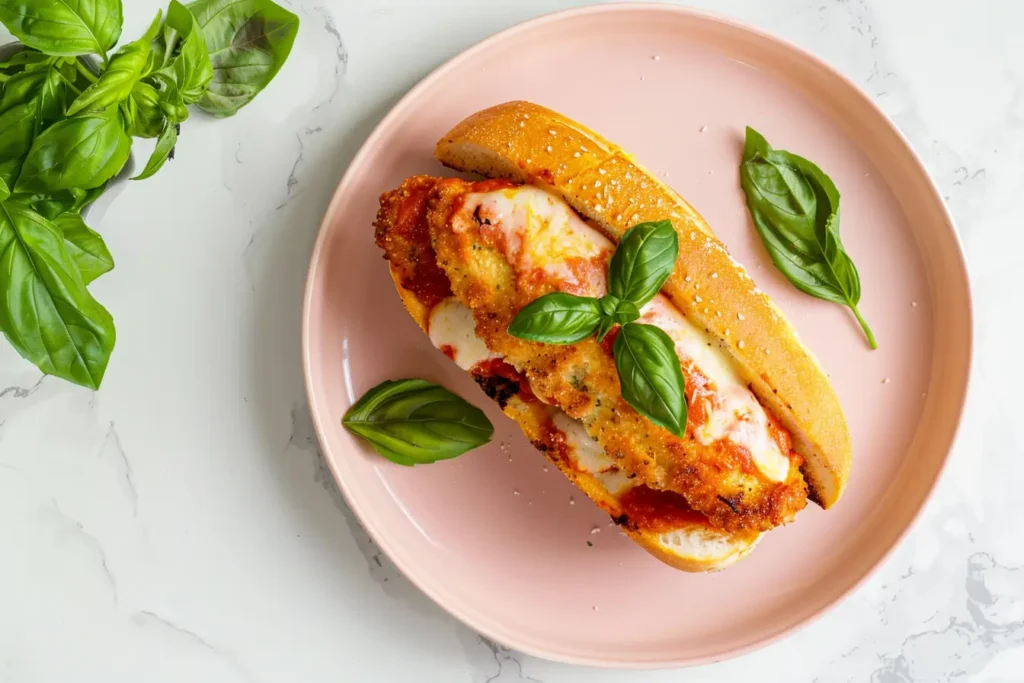
Now that you’ve crafted the perfect chicken parm sandwich, let’s take it to the next level! Whether you’re looking for the best side dishes, ways to store and reheat leftovers, or fun variations to customize your sandwich, I’ve got you covered. Here are my top tips to make sure every bite is as delicious as the first!
Best Side Dishes to Pair with a Chicken Parm Sandwich
A chicken parm sandwich is already packed with flavor, so the best sides complement it without overpowering it. Here are some perfect pairings:
🥔 Crispy Garlic Parmesan Fries – A classic, but elevate them by tossing in garlic butter and Parmesan cheese for an extra kick.
🥗 Italian Chopped Salad – The fresh crunch of romaine, cherry tomatoes, red onion, and Italian dressing balances the richness of the sandwich.
🍲 Tomato Basil Soup – Dunking your cheesy sandwich into a warm, herby soup? Absolute perfection.
🍆 Garlic Roasted Vegetables – If you want something lighter, zucchini, eggplant, and bell peppers roasted with garlic pair beautifully.
🍗 Chicken Fries – A crispy sidekick! These are fun to dip into extra marinara or garlic aioli.
🔗 Looking for another crispy side dish? Check out this easy recipe for Chicken Fries!
How to Store & Reheat for the Best Leftovers
Want to save your sandwich for later? Here’s how to keep it fresh and crispy when reheating:
📦 Storing Leftovers (Keep It Crispy!)
✔ Separate the chicken from the bun – This prevents sogginess.
✔ Store chicken in an airtight container – Keeps it crispy for up to 3 days in the fridge.
✔ Wrap bread in foil or keep in a paper bag – Helps it stay fresh and not dry out.
🔥 Reheating the Chicken (Best Methods)
✔ Oven (Best Method) – Preheat to 375°F (190°C) and bake on a wire rack for 10-12 minutes.
✔ Air Fryer (Quick & Crispy) – Heat at 350°F (175°C) for 5-6 minutes for a crispy finish.
✔ Stovetop (Fastest Option) – Heat in a dry skillet over medium heat for 2-3 minutes per side.
🚫 Avoid microwaving! It makes the breading soggy and the chicken chewy.
Customizations & Variations (Make It Your Own!)
Want to switch things up? Here are some fun ways to customize your chicken parm sandwich:
🌶️ Spicy Kick: Add crushed red pepper flakes to the marinara or drizzle on some hot honey for a sweet-heat twist!
🥑 Healthier Option: Swap the bun for lettuce wraps or serve over zucchini noodles for a low-carb version.
🧀 Extra Cheesy: Mix smoked provolone with the mozzarella for a richer, smokier flavor.
🍞 Gluten-Free Alternative: Use gluten-free breadcrumbs and sandwich it between toasted gluten-free buns.
🔗 Want a different take on this classic? Check out this Chicken Parm Sub Recipe from AllRecipes!
Common Mistakes to Avoid (And How to Fix Them!)
Even the best cooks can make small mistakes that impact the final sandwich. Here’s how to avoid them:
🚫 Overcooking the Chicken – Results in dry, rubbery meat.
✅ Fix: Use a meat thermometer and remove at 165°F (75°C).
🚫 Not Draining the Oil Properly – Leaves the chicken greasy instead of crispy.
✅ Fix: Place the chicken on a wire rack, not paper towels, to let excess oil drip off without making it soggy.
🚫 Skipping Toasting the Bread – Leads to a mushy, weak sandwich.
✅ Fix: Lightly butter and toast the bread for 1-2 minutes before assembling.
Now you’re officially a chicken parm sandwich pro! From the crispy, golden cutlet to the gooey, melted cheese and flavorful marinara, this sandwich is everything comfort food should be.
FAQ & Recipe Schema
What is the best bread for a chicken parm sandwich?
The best bread for a chicken parm sandwich depends on your preference. Hoagie rolls are the classic choice—they’re sturdy and hold up well to the sauce. If you want something softer, brioche buns add a buttery touch. For a rustic bite, ciabatta works well but should be toasted to prevent fogginess.
Can I make a chicken parm sandwich in an air fryer?
Absolutely! An air fryer is a game-changer for making a crispy chicken parm sandwich with less oil. Just preheat to 375°F, cook for 12-15 minutes, then add marinara and mozzarella for the final melt.
How do you keep a chicken parm sandwich from getting soggy?
✔ Toast the bread before assembling to create a barrier against moisture.
✔ Add marinara sauce to the bread, not the chicken—this keeps the crispy coating intact.
✔ Assemble right before eating to maintain crunch.
What sides go well with a chicken parm sandwich?
A chicken parm sandwich pairs well with:
Garlic Parmesan Fries 🍟 – Crispy fries with a garlicky twist.
Chicken Fries 🍗 – A fun, crispy side option.
Tomato Basil Soup 🍅 – A warm, comforting dip.
Italian Chopped Salad 🥗 – Fresh greens to balance the richness.
Can I make chicken parm sandwiches ahead of time?
Yes! You can prep and cook the chicken cutlets in advance. Store them in an airtight container in the fridge for up to 3 days. When ready to eat, reheat in a 375°F oven for 10 minutes before assembling the sandwich. Avoid assembling ahead of time to prevent soggy bread.
What’s the difference between a chicken parm sandwich and a chicken parm sub?
A chicken parm sandwich is typically served on brioche buns, Kaiser rolls, or ciabatta, while a chicken parm sub is made on a long Italian hoagie roll. Subs often have more sauce and cheese since they hold larger portions.
Can I freeze a chicken parm sandwich?
You can freeze the breaded chicken separately, but don’t freeze the assembled sandwich—it will get soggy. To freeze:
✔ Let cooked chicken cool completely.
✔ Wrap each piece tightly in plastic wrap & place in a freezer bag.
✔ Freeze for up to 3 months.
✔ Reheat in a 375°F oven for 15 minutes before assembling.
Looking for more delicious recipes? If you love hearty meals, check out our Main Dishes collection—perfect for family dinners or special occasions. Or, if you’re craving something sweet, browse our Snacks, Desserts & Bites section for tasty treats. There’s always something new and exciting to cook!
Print
Chicken Parm Sandwich
- Total Time: 35 minutes
- Yield: 4 sandwiches 1x
Description
A crispy, cheesy chicken parm sandwich made with golden-fried chicken cutlets, rich marinara sauce, and gooey melted mozzarella on toasted Italian bread.
Ingredients
For the Chicken:
- 2 boneless, skinless chicken breasts (pounded to ½-inch thickness)
- 1 cup all-purpose flour
- 2 large eggs
- 1 tablespoon milk
- 1 cup Italian-style breadcrumbs
- ½ cup Panko breadcrumbs
- ½ cup grated Parmesan cheese
- 1 teaspoon garlic powder
- 1 teaspoon onion powder
- ½ teaspoon salt
- ½ teaspoon black pepper
- ½ teaspoon paprika
- ½ cup vegetable oil (for frying)
For Assembly:
- 4 hoagie rolls (or brioche buns)
- 1 cup marinara sauce
- 8 slices fresh mozzarella cheese
- ¼ cup grated Parmesan cheese
- 2 tablespoons unsalted butter (for toasting)
- 1 teaspoon garlic powder (for toasting)
- Fresh basil (for garnish)
Instructions
- Prepare the breading station: In separate bowls, set up flour, egg wash (eggs + milk), and breadcrumbs mixed with Parmesan and spices.
- Bread the chicken: Dredge each cutlet in flour, egg wash, and breadcrumbs, pressing to adhere. Repeat for a double-coating.
- Fry the chicken: Heat oil in a skillet over medium-high heat (350°F/175°C). Fry each cutlet for 3-4 minutes per side until golden and crispy. Drain on a wire rack.
- Toast the bread: Spread butter and garlic powder on the hoagie rolls and toast in a skillet for 1-2 minutes.
- Assemble the sandwich: Spoon marinara on the toasted bread, place crispy chicken on top, add mozzarella, and broil for 30 seconds until melted.
- Garnish & serve: Sprinkle with Parmesan and fresh basil, then enjoy!
Notes
✔ For a healthier version, bake the chicken at 425°F for 20 minutes instead of frying.
✔ For extra crunch, use Panko breadcrumbs in the coating.
✔ To reheat, bake at 375°F for 10 minutes to restore crispiness.
- Prep Time: 15 minutes
- Cook Time: 20 minutes
- Cuisine: Italian-American
Nutrition
- Serving Size: 1 sandwich
- Calories: ~650 per sandwich
- Sugar: ~6g
- Fat: ~30g
- Carbohydrates: ~60g
- Fiber: ~4g
- Protein: ~45g
- Cholesterol: ~125mg
Tried this recipe? Snap a photo and tag me on Instagram @RecipesFriday—I love seeing your creations!

