Wondering how to make duck breasts more tender? You’re not alone! The first time I tried cooking duck breast at home, I made every mistake in the book—high heat right away, no scoring, and worst of all? I sliced into it way too soon. The result? A chewy, rubbery disaster that was more like overcooked steak than the juicy, flavorful duck I had imagined. Now I know how to make duck breasts more tender with ease.
But then, I learned the secret. Or rather—a few simple techniques that changed everything. Suddenly, my duck breast had crispy, golden-brown skin, meat so tender it practically melted in my mouth, and just the right amount of richness. And the best part? It wasn’t complicated.
The key to making duck breast perfectly tender comes down to how you prepare, cook, and rest it. If you’ve ever struggled with dry, tough duck, I’ve got you covered. In this guide, I’ll walk you through every step—from prepping the meat to cooking it just right—so you never have to deal with rubbery duck again.
But before we dive into the cooking process, let’s talk about what makes duck breast so unique—and why it needs to be handled differently than chicken or steak.
Table of Contents
The Science Behind Tender Duck Breast
Ever wonder how to make duck breasts more tender and avoid the common mistakes that lead to tough, chewy meat? Unlike chicken or beef, duck breasts require specific techniques to achieve that perfect balance of crispy skin and juicy, flavorful meat. Mastering the right cooking approach will ensure your duck breasts turn out more tender every time.
Understanding why duck breast behaves differently in the pan is the key to making it more tender every time. Let’s break it down.
Why Duck Breast Can Be Tough (And How to Prevent It)
Unlike chicken, which has mostly white meat, duck breast is red meat—closer in texture to beef than poultry. This means:
✔ It’s best cooked medium-rare to medium (not well-done like chicken).
✔ It contains a thick layer of fat under the skin, which must be properly rendered to avoid chewiness.
✔ The muscle fibers is denser, meaning a high-heat sear alone won’t make it tender.
Common Mistakes That Lead to Tough Duck
❌ Cooking at too high a heat from the start – This causes the skin to crisp too quickly, leaving fat trapped underneath, making the meat greasy and tough.
❌ Skipping the scoring process – If the skin isn’t scored, the fat can’t render properly.
❌ Not letting the meat rest before slicing – Cutting too soon lets the juices escape, drying out the meat.
The Solution? Slow, controlled cooking techniques that allow the fat to render gradually while keeping the meat juicy.
The Role of Fat Rendering: Why Scoring & Low Heat Matter
Duck breast has a thick fat cap that needs to be slowly rendered down for the best texture. This is where two essential techniques come in:
1. Scoring the Skin Properly
Lightly cutting the skin in a crosshatch pattern (without piercing the meat) allows the fat to render out evenly, crisping the skin while preventing greasy, undercooked patches.
How to Score Duck Breast:
✔ Use a sharp knife to make shallow cuts in a diamond pattern.
✔ Avoid cutting into the actual meat—only the skin and fat should be scored.
✔ This helps the fat render out slowly and evenly for maximum tenderness.
2. Starting in a Cold Pan
Unlike most meats that need a preheated pan, duck breast benefits from starting cold and gradually heating up.
Why?
✔ It gives the fat more time to render, preventing a thick, chewy layer of fat under crispy skin.
✔ It ensures even cooking and helps develop a golden, crispy crust.
✔ It prevents the skin from burning before the fat is fully rendered.
The Best Cooking Temperatures for Tender Duck Breast
Because duck breast is closer to steak than poultry, the internal temperature matters just as much as the technique. Here’s the ideal temperature guide:
- Rare: 125°F (52°C) – Very soft texture, not recommended for most home cooks.
- Medium-Rare: 130-135°F (54-57°C) – The sweet spot for tender, juicy duck breast.
- Medium: 140°F (60°C) – A bit firmer, still juicy.
- Well-Done: 155°F+ (68°C) – Not recommended; the meat will be tough and dry.
For best results? Aim for 130-135°F and always let the duck rest for 5-10 minutes before slicing. This lets the juices redistribute, keeping it moist and tender.
Now that you understand why duck breast behaves differently, it’s time to put this knowledge into action. Before we start cooking, let’s go over the essential pre-cooking steps—choosing the right duck, proper scoring, and other tricks that set you up for success.
Pre-Cooking Guide – Setting Yourself Up for Success
Before you even think about turning on the stove, there are a few essential steps that will make or break your duck breast. The secret to tender, juicy duck isn’t just in how you cook it—it starts with proper preparation.
Let’s go over everything you need to do before the pan gets hot.
Essential Tools & Equipment for Cooking Duck Breast
A few key kitchen tools will make cooking duck easier and more foolproof:
✔ Sharp Knife: Essential for scoring the skin properly without cutting into the meat.
✔ Cast Iron or Heavy-Bottomed Skillet: Helps with even heat distribution for a crispy sear.
✔ Tongs: Makes flipping the duck easier without piercing the meat.
✔ Instant-Read Meat Thermometer: Ensures you hit the perfect internal temperature.
No cast iron pan? A stainless steel skillet will work, but avoid non-stick pans—they prevent proper browning.
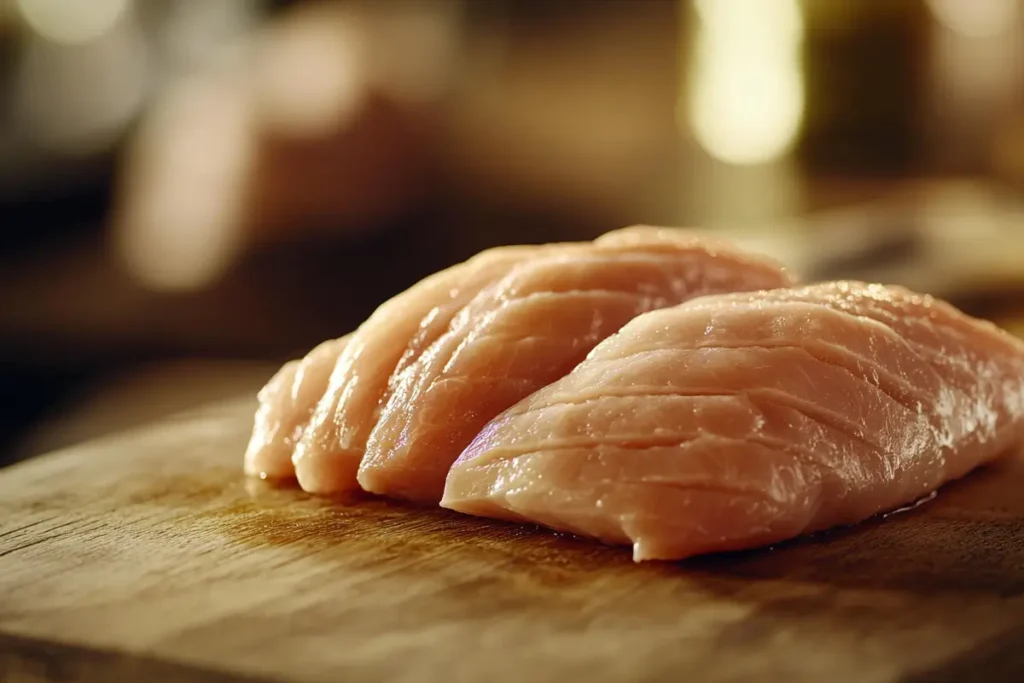
How to Properly Prepare Duck Breast (Prepping Like a Pro)
Great duck starts with properly preparing the meat before it ever touches the heat.
1. Bring the Duck Breast to Room Temperature
Cold duck breast straight from the fridge will cook unevenly. Let it rest on the counter for 20-30 minutes before cooking.
2. Score the Skin (But Not Too Deep!)
This is one of the most important steps for rendering fat properly.
✔ Use a sharp knife to make shallow diagonal cuts across the skin.
✔ Don’t cut into the meat—just the fat layer.
✔ A crosshatch pattern helps fat escape while keeping the skin intact.
Why does this matter? If you don’t score the skin, the fat won’t render properly, and you’ll end up with a chewy, greasy layer underneath the skin.
3. Pat the Duck Breast Dry (This Step Matters!)
Moisture is the enemy of crispiness! Use paper towels to thoroughly dry the skin before seasoning.
✔ A dry surface helps create that golden, crispy crust.
✔ If the skin is damp, it will steam instead of crisping up.
Common Mistakes to Avoid Before Cooking
❌ Skipping the scoring process → Leads to unrendered fat and chewy skin.
❌ Cooking duck straight from the fridge → Causes uneven cooking.
❌ Not drying the skin properly → Results in soggy skin instead of a crispy crust.
❌ Using high heat too soon → Can burn the skin before the fat has time to render.
Now that your duck breast is properly prepped, it’s time to cook! The next step is crucial—learning the exact technique to achieve a crispy skin and tender, juicy meat.
Let’s dive into the step-by-step cooking process so you can make a restaurant-quality duck breast at home.
Step-by-Step Guide to Cooking Perfectly Tender Duck Breast
Now that your duck breast is scored, dried, and ready to go, it’s time for the fun part—cooking! Follow these precise steps, and you’ll get a crispy, golden skin with a juicy, tender interior every single time.
Let’s get started.
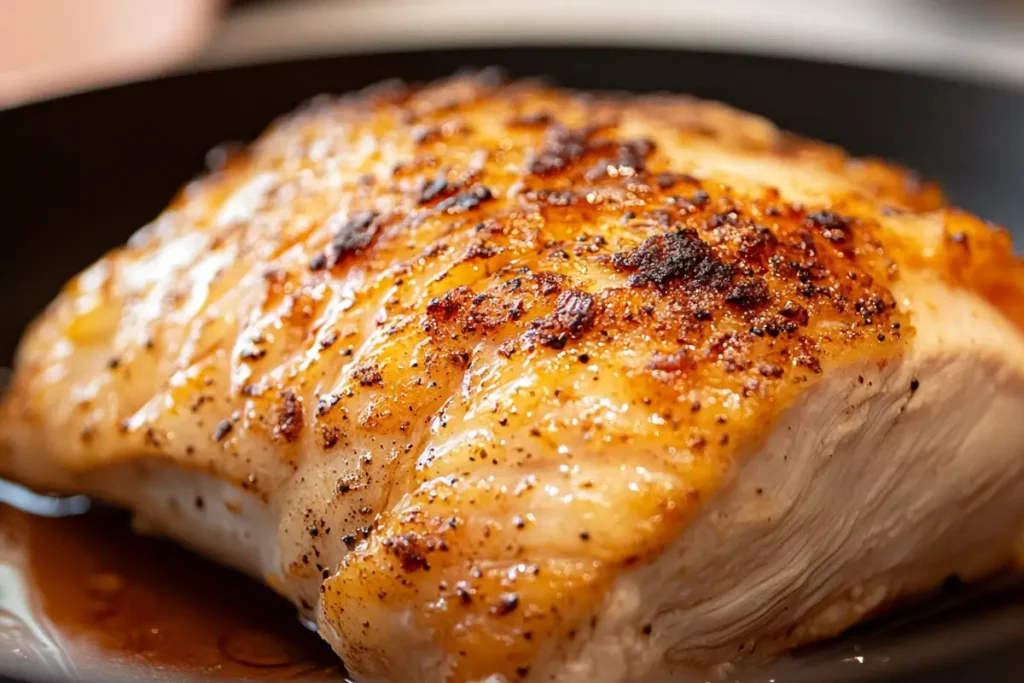
Step 1: Start with a Cold Pan for the Perfect Sear
✔ Place the duck breast skin-side down in a cold, dry skillet.
✔ Set the heat to medium-low—resist the urge to crank it up!
✔ Allow the fat to slowly render for 8-12 minutes, until the skin turns a deep golden brown and feels crispy to the touch.
🚀 Pro Tip: If the skin starts browning too fast, lower the heat slightly. Slow rendering ensures tenderness!
Step 2: Flip and Sear the Other Side
✔ Once the skin is crispy and 80% of the fat has rendered, flip the duck breast.
✔ Increase heat slightly to medium and cook for 2-3 minutes on the flesh side.
✔ Use a meat thermometer to check doneness:
- 130-135°F (54-57°C) for medium-rare (ideal for tender duck breast).
- 140°F+ (60°C+) for medium to well-done (firmer texture).
🚀 Pro Tip: If your duck breast is thick, finish it in a preheated 350°F (175°C) oven for 3-5 minutes to ensure even cooking.
Step 3: Rest Before Slicing (Don’t Skip This!)
✔ Remove the duck from the pan and place it on a cutting board, skin-side up.
✔ Let it rest for 5-10 minutes—this allows the juices to redistribute, keeping the meat tender.
✔ While resting, pour out excess fat from the pan, leaving about 1 tablespoon for a quick pan sauce (optional).
🚀 Expert Advice: Don’t slice too soon! Cutting right away causes juices to escape, making the meat dry.
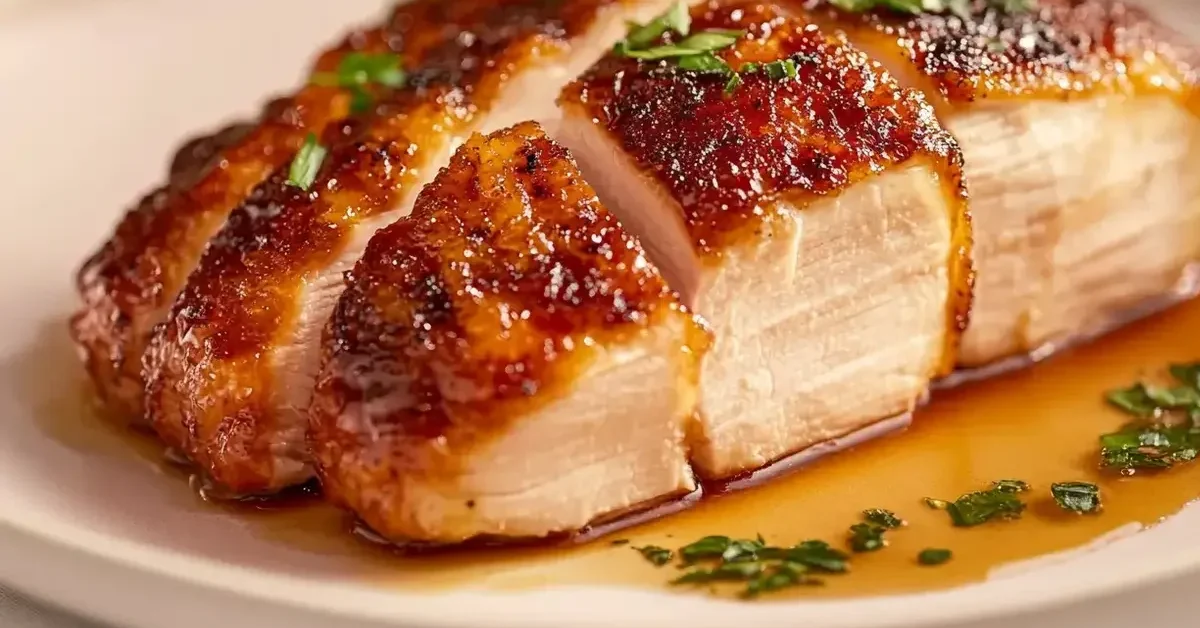
Step 4: Slice & Serve Like a Pro
✔ Use a sharp knife to slice the duck against the grain into thin, even pieces.
✔ Arrange on a plate, and serve with your favorite sides and sauces.
🔥 Want to elevate the flavor? Try serving with:
- Orange glaze for a tangy-sweet contrast.
- Red wine reduction for a deep, rich pairing.
- Crispy roasted vegetables to balance the richness.
You’ve now mastered the art of cooking tender duck breast! But what about leftovers? How do you store and reheat duck without losing its texture?
Additional Tips, Pairings, and Storage Hacks
Now that you’ve mastered the perfectly tender duck breast, let’s talk about how to take it to the next level. Whether you want to elevate the dish with delicious pairings, store leftovers the right way, or customize the flavors, these extra tips will make sure your duck turns out incredible every time.
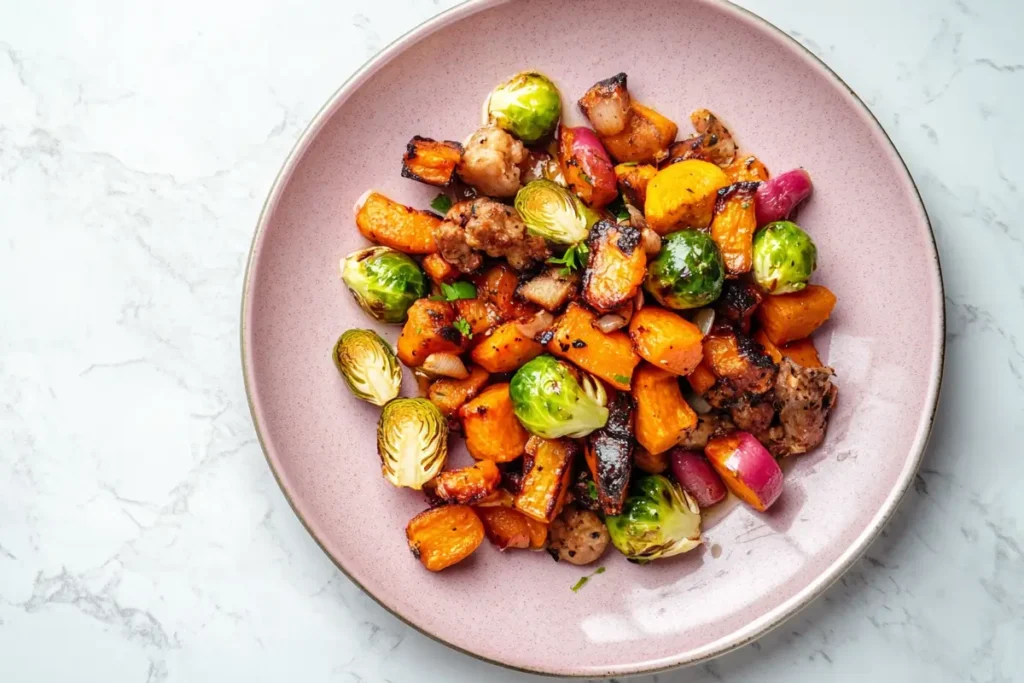
Perfect Pairings & Side Dishes
A beautifully seared duck breast deserves the perfect sides and sauces to complement its rich, savory flavor. Here are some top pairings:
✔ Bright & Tangy Sides: Balance the richness of the duck with sides like roasted Brussels sprouts with balsamic glaze or citrus salad with arugula and walnuts.
✔ Classic French Pairing: Serve with a side of creamy mashed potatoes and a drizzle of red wine reduction for a restaurant-style presentation.
✔ Asian-Inspired Twist: Pair with steamed jasmine rice and a sweet-savory hoisin glaze for an easy, flavorful meal.
🚀 Insider Tip: A fruity sauce, like cherry or orange glaze, brings out the best in duck by adding a pop of acidity and sweetness!
How to Store, Reheat & Make Ahead
If you have leftover duck breast, don’t worry—it keeps well when stored properly! Here’s how to keep it fresh without losing its tenderness:
✔ Storing Leftovers: Place cooled duck breast in an airtight container and store it in the fridge for up to 3 days.
✔ Freezing for Later: Wrap the duck tightly in plastic wrap, then place in a freezer-safe bag for up to 3 months. Thaw overnight in the fridge before reheating.
✔ Reheating Without Drying It Out: Warm the duck in a 300°F oven for 10 minutes to keep it juicy, or pan-sear for 1-2 minutes on low heat.
🚀 Chef’s Secret: Avoid microwaving! It dries out the meat and ruins the crispy skin.
Creative Serving Ideas
Want to get creative? Try these fun ways to serve your duck breast beyond the classic plate presentation:
✔ Duck Tacos: Slice the duck thin and serve in warm tortillas with pickled onions and a spicy aioli.
✔ Duck Salad: Add sliced duck to a fresh green salad with goat cheese, pecans, and a light vinaigrette.
✔ Duck & Eggs Brunch: Serve over buttery toast with a soft poached egg for a next-level breakfast.
🚀 Pro Tip: Leftover duck makes a fantastic sandwich filling—slice it thin and layer with fig jam, arugula, and brie cheese for a gourmet sandwich!
More Expert Cooking Tips & Recipe Variations
If you loved this recipe, check out this expert guide for more ways to cook duck breast like a pro!
For alternative methods, this trusted source from AllRecipes has additional duck preparation ideas you might enjoy.
Before you go, let’s answer some common questions about cooking duck breast, plus a handy recipe card you can save for later.
Frequently Asked Questions
Q1: Why is my duck breast tough instead of tender?
Tough duck breast is usually caused by overcooking, improper fat rendering, or skipping the resting time. To fix this:
Cook to 130-135°F (54-57°C) for medium-rare tenderness.
Slowly render the fat by starting in a cold pan over medium-low heat.
Let it rest for at least 5 minutes before slicing to retain its juices.
Q2: Do I need to marinate duck breast before cooking?
Not necessarily! Duck breast is naturally flavorful and doesn’t require marination. However, a quick dry brine (sprinkling salt and letting it rest for an hour) can enhance tenderness by drawing out moisture and improving the sear.
Q3: Should I cook duck breast skin-side down first?
Yes! Always start skin-side down in a cold pan—this allows the fat to render slowly and creates a crispy, golden crust. Cook for 8-12 minutes before flipping to finish on the flesh side.
Q4: How can I tell when duck breast is cooked perfectly?
The best way to check is by using a meat thermometer:
Rare: 125°F (52°C)
Medium-Rare (Best): 130-135°F (54-57°C)
Medium: 140°F (60°C)
Well-Done: 155°F+ (68°C) (Not recommended—this can make it tough!)
Q5: What’s the best way to reheat duck breast without drying it out?
A: The oven is the best method:
Preheat oven to 300°F (150°C).
Place duck breast on a baking tray and cover loosely with foil.
Heat for 10 minutes until warmed through.
Avoid the microwave—it can make the meat rubbery!
Q6: Can I freeze cooked duck breast?
A: Absolutely! Let it cool completely, then:
Wrap tightly in plastic wrap, then in a freezer-safe bag.
Store for up to 3 months.
Thaw in the fridge overnight before reheating.
Related Recipes You’ll Love
Looking for more delicious meals? Check out our Main Dishes collection for hearty, satisfying recipes. If you’re in the mood for something sweet, browse our Snacks, Desserts & Bites section for fun and tasty treats!
Print
How to Make Duck Breast More Tender
- Total Time: 20 minutes
- Yield: 2 servings 1x
Description
Learn how to cook duck breast so it’s perfectly tender, juicy, and crispy. Follow this step-by-step guide to achieve restaurant-quality duck breast at home using simple techniques.
Ingredients
-
For the Duck Breast:
- 2 duck breasts (6–8 oz each)
- 1 tsp kosher salt
- ½ tsp black pepper
- ½ tsp garlic powder (optional)
For Cooking:
- 1 tsp olive oil
- 1 tbsp butter (optional for basting)
- 1 sprig fresh thyme or rosemary (optional for aroma)
Instructions
-
Prepare the Duck:
- Bring duck breast to room temperature for 20-30 minutes.
- Pat dry with paper towels and score the skin in a crosshatch pattern.
- Season both sides with salt, pepper, and garlic powder.
-
Render the Fat:
- Place the duck skin-side down in a cold pan (no oil needed).
- Turn heat to medium-low and cook for 8-12 minutes, allowing the fat to render.
-
Flip and Finish Cooking:
- Flip the duck breast and cook for 2-3 minutes on the flesh side.
- If needed, transfer to a 350°F oven for 3-5 minutes to finish cooking.
-
Rest & Slice:
- Remove from heat and let it rest for 5-10 minutes before slicing.
- Slice against the grain for the most tender results.
Notes
- Serve with a fruit glaze (orange, cherry, or fig) for a gourmet touch.
- Use a meat thermometer for precision—130-135°F is ideal for medium-rare.
- Leftovers? Reheat in the oven at 300°F for 10 minutes to maintain texture.
- Prep Time: 5 minutes
- Cook Time: 15 minutes
- Cuisine: French, Modern European
Nutrition
- Serving Size: 1 duck breast (~6 oz)
- Calories: ~350 per serving
- Fat: ~20g
- Carbohydrates: ~0g
- Protein: ~40g
- Cholesterol: ~95mg